Showing posts with label Kitchen Tip. Show all posts

Kitchen Tip Tuesday!


I am honored, and oh so excited to be hosting Kitchen Tip Tuesday today!  Tammy's blog was one the first blogs I started reading when I began blogging - and I love her Kitchen Tip Tuesday slot. I always learn so much.  


Tammy asked myself and some other amazing bloggers to host for her while she spends the month with her family.  If you missed it - be sure to check out the awesome tips shared at Amy's Finer Things and Lynn's Kitchen Adventures.  

One of the most frequent questions I get via email is "I don't have a bread machine or a stand mixer, can I make this bread recipe by hand?".  So, my kitchen tip today is how to adapt any bread recipe to be made by hand.  


While individual ingredients vary by recipe, this basic 7-step process can be applied:

Step 1: Mix ~ 1/2 C warm liquid (i.e., water or milk as directed by the recipe) and yeast together in a large bowl.  Allow the yeast water mixture to sit for 2-3 minutes, until yeast is slightly foamy.  

Step 2: Add in the sweetener and the salt.  Continue to let the mixture rest for 1-2 minutes.  If the recipe calls for eggs, oil, powdered milk, butter, etc., add those here too.  

Step 3: Add the flour to the mixture, 1 C at a time.  Stir with a wooden spoon or spatula as you add the flour.  Alternate the flour with the remaining wet ingredients (i.e., water, milk, buttermilk, etc) until all the ingredients are in the bowl.  

Step 4: Using clean hands, lightly sprinkle a little flour over a work surface and your hands.  Dump the dough out onto the work surface and knead (incorporating more flour as needed) until dough is smooth.  This takes anywhere from 5-10 minutes of kneading.  

Step 5: Shape the smooth dough into a ball.  Place in a lightly greased bowl, and cover with a towel.  Allow the dough to rise until doubled in size.  

Step 6: Punch down the dough (literally, make a fist and punch the dough) and then shape into a loaf.  Place in a lightly greased loaf pan.  Cover.  Allow the dough to rise again until the dough is close to doubled, or it has risen 1-3 inches over the top of the loaf pan.  

Step 7: Bake the loaf, generally at 350 degrees, until lightly browned and the loaf sounds hallow when tapped.  This varies by recipe, but usually is somewhere between 30-45 minutes.  


Hope that is helpful for those of you without a machine to help you bread making efforts!  

Be sure to follow Kitchen Tip Tuesday over the next two weeks to see what tips some other great food bloggers have to share!   


Linked to: Works for Me Wednesday

Mother's Day Brunch Ideas


The task: sharing a meal in photos.
The selection: great ideas for Mother's Day dining!


While you're waiting for all the other yummy breakfast goodies, 
these Blueberry Cinnamon Rolls make a nice mid-morning treat.


A great brunch quiche, like this chicken spinach dish
is the perfect main dish recipe.  


Serve up the veggie-filled quiche with a delicious berry smoothie


If you need a side dish, try these oven-roasted breakfast potatoes
they would go lovely with the quiche.  


For dessert, or a sweet afternoon treat, our top three choices are:


Happy Mother's Day!

Thanks, Tiffanee for the "encouragement" to do this!

Freezing Spinach


Today, I am honored to guest post over at Tiffany's Eat At Home blog!


I do hope you'll stop by as I'm sharing one of our favorite ways to buy spinach in bulk and freeze it for use later!  A cheap way to stock your freezer full of a nutritious veggie!


Photobucket

Menu Ideas - Help Needed!


We're having a great brainstorming session over at Finding Joy in My Kitchen's Facebook Page focused on healthy meals that taste great even to the picky eater!

Please stop by and contribute your ideas -- what do you do in this situation?  Do you hide veggies?  Do you try new veggies in different recipes?  Can't wait to hear what works in your family.


Photobucket

Kitchen Tip: Tupperware


A few weeks ago, you told me what your top areas would be to organize your kitchen given the chance to do so.  Want to guess the top two trouble spots in your kitchens?

1) Pantry

2) Plastic storage containers

Today - I'd like to share with you a cheap, quick and easy solution to the plastic container problem.


We store our plastic containers on a pull-out drawer and place all the lids in a large plastic storage container.


By stacking the containers by size (which never seems to be a problem), we conserve space.

The plastic storage container works wonderfully to corral the crazy lids.  Which seem to take over any space they enter into -- or is that just me?


That's what we've found that works to keep our tupperware in check -- what works for you?


Photobucket

Works for me Wednesday, Kitchen Tip Tuesday

Kitchen Tip: Applesauce


Growing up, I learned a little trick from my mom, and it's name is applesauce.


While I am an applesauce snob {I only eat 1 kind of applesauce, and that's homemade}, I bake with Mott's Natural (no added sugars) applesauce all the time.  Simply apples and water -- I can handle purchasing this to bake with, especially with all the coupons and sales.  

image from walmart.com

My mom taught me that applesauce can be used in place of the fat (oil/butter) used in most baking recipes.  Oil/butter and applesauce can be substituted in a 1:1 ratio.

Take this decadent chocolate cake, for example.


The original recipe called for 1/2 C oil.

The first time I made it, I substituted half of the oil for applesauce (1/4 C each).

When I made it recently, I tried a full 1/2 C applesauce in place of the oil. {As well as made it with 100% white wheat flour}.


And, it worked out wonderfully.

I freeze my applesauce in ice cube trays - mine hold 1/4 C.  Then, I keep the frozen cubes in a large bag or container and use them as I need them.  It keeps the applesauce, especially since I use all natural from going bad before I have a chance to use it all.  

Now -- there are a few caveats to baking with applesauce:
  • Your baked goods will be more moist.  
  • Your baked goods will be more dense.
  • Your baked goods may not rise as much as they typically would.  
  • Your baked goods may need to be baked for a bit longer due to the extra moisture.
Give it a try!  With any recipe, I typically start by substituting half of the oil/butter for applesauce and see how that turns out.  If I want a more fluffy cake, I'll add in additional baking powder, ~1 tsp. per large cake, for example.  This seems to help!

An adventurous spirit is required :)  If that works out well, I try it again the next time with all applesauce.  

Have you cooked with applesauce before?  What works for you?

Photobucket

This post is linked to:

Summer Cookin'

The weather is starting to heat up around here, which means there's one place I don't want to heat up... my kitchen.

There are two things I've tried recently to help keep the heat out of the kitchen:

(1) Bake using the toaster oven!

I recently made Berry Baked Oatmeal in the toaster oven -- it was so nice to have a warm breakfast but not heat up our little apartment!


I watched it carefully, cooked the breakfast on the bottom rack and adjusted the temperature and cooking time a bit, but I did it with success!  And, will certainly be trying it again since my little 9x9 pan fits perfectly in the toaster oven.

I'm interested in trying out more things in my toaster oven this summer:
  • roasting veggies/potatoes
  • making oven fries (a summer "staple" when we grill)
  • brownies!
  • muffins
  • quick breads
  • pasta bakes
  • bread sticks
  • pot pies
  • quiches
  • and cookies!

(2) Only boil foods for a few minutes.

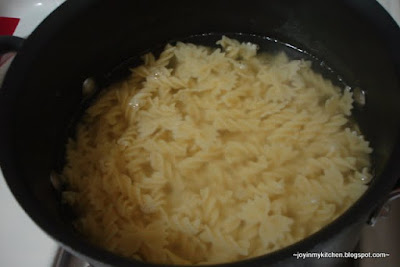
I've tried making pasta with only 3 minutes of "heat" time.  Dump your pasta in the water right away and cover the pan.  Then, turn on the burner long enough to heat the water to a slow boil (with my gas stove, that takes about 2 minutes).  Allow the pasta to slow boil for about another minute.  Next, turn off the burner.

Your pasta will keep cooking in the warm water.


Cooking this way does take more time, but it really cuts down on the heat/steam in the kitchen.


I've also tried this with potatoes, boiling them just a little longer (~8 minutes) and allowing them to sit for 30-40 minutes.

Saving Energy in Addition to Heat -- 

Not only does it keep the heat out -- but, it cuts down on your energy use too!
  • You know your oven is the "hummer" of the kitchen, right?!  
It's the most fuel inefficient portion of our kitchen, and the stove top isn't much better.

If you do need to use the oven, consider trying a similar approach -- place the food in the oven without preheating it.  Then, bake (especially a pasta dish of sorts) for half or 3/4 of the cooking time.  Turn off the oven and do not open the door.  Allow the dish to continue cooking in the warm oven as it cools.  This works wonderfully for most things, except breads/baked goods.    
  • And, you know that water boils at 212 degrees, right?   
Unless in a time crunch, there's no need to "rapidly boil" because the water temperature of boiling is still 212 degrees -- you're not making it any warmer by seeing more bubbles.  Instead, we're just using more energy (and releasing more heat into our kitchens).

So... heat it to a slow boil and turn the gas/electric burner off.  You'll save tons of energy in the process, and keep your kitchen cooler!

That's my kitchen-tip for today... for more, visit Tammy's Kitchen Tip Tuesday.

Cooking Green: Crockpot

Did you know that cooking with your crockpot is the most energy efficient method of cooking?

Yep.

I juts finished reading a wonderful book, "Cooking Green: Reducing Your Carbon Footprint in the Kitchen" by Kathy Heyhoe and it is stuffed full of excellent tips to reduce your energy expenditure while cooking.

That's where I learned that the most energy efficient way to cook is via your crockpot!  Seriously.  It's way more efficient than your oven {which is anaologus to a Hummer!} and even more so than your burner.  That gives me great excuse to use my crockpot even more!

I'll be sharing some more of Kathy's tips for cooking green over the next few weeks, but since today Smockity Frocks is having a crockpot carnival, I thought it best to tell you this tip today :)

In addition to crockpots being a green way to cook, they also are a great time saver.  At a minimum, we use our crockpot twice each week (Wednesdays and Fridays) because it enables us to have a warm, yummy, healthy dinner after arriving home late in the afternoon.

So, what do we make in our crockpot?  I'll let you take a gander at a few our our favorites....


Crockpot Apple Cake (which just happens to be fat free)


We also make virtually all our soups in the crockpot -- so easy and so yummy!

What's your favorite crockpot recipe? 

This post is linked to:


Kitchen Tip: Freezer Edition

I love my freezer.

I have been known to freeze just about anything.

Cheese.

Peppers.


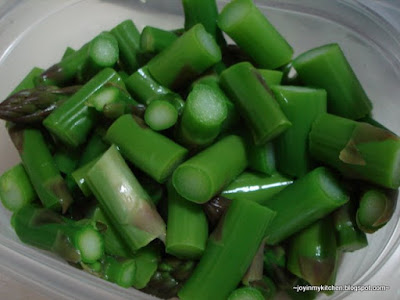
Asparagus.


Fruit.


Meat.

Butter.

You name it - I freeze it.

Well, I haven't tried freezing milk, but I hear it works well.

Recently, I've added two must-haves to our freezer.

First, is carrot (and/or sweet potato puree).


Boil up those carrots, and then puree them in a blender with just a little liquid (leftover from the boiling).  You may also add cooked sweet potatoes to the carrots for a yummy blend.

Then, place the puree into ice cubes and freeze until solid.

Remove them from the ice cube trays and store in a large freezer bag.


Then, pop them out of the tray and store them in a bag in the freezer.

I've been adding carrot puree to anything with tomatoes ... it cuts the acid, and adds more vitamins!  We use it in lasagna, homemade spaghetti sauce, pizza sauce, baked ziti, and, it's also handy to have for carrot bread, carrot bars or even pancakes!

I also tend to freeze applesauce this way too -- that way, it's always available as a substitute for oil in baked-goods.

Second, I've been freezing apples.

And, I love it.

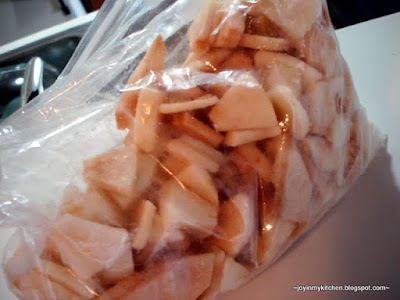
Cut up the apples, freeze them on a parchment-paper covered cookie sheet and then pack them into a gallon freezer bag.


In the morning, take out what you want, saute them with a little cinnamon and you have an excellent alternative to syrup or a great add-in to your oatmeal.


Having apples in the freezer like this has helped me to have one additional serving of fruit every day!  These apples also go well in muffins, crisps and pies!

For more freezer-friendly tips, check out this great post at Getting Freedom from Debt!

This post is linked to:

Kitchen Tip: Honey

I use honey quite a bit in my cooking... but, it's always troublesome to get the honey out of the spoon or cup I used to measure it!

Not any more; one easy step and you have honey that glides right out of your utensil.


Simply spray the spoon or cup with cooking spray before measuring the honey.

Or, measure the oil in your recipe with the same spoon you'll later use to add the honey.

Works like a charm.

Kitchen Tip from Mom

During my time at home last week, my mom and I reminisced about the years when my sister and I were little kiddos. Mind you, they weren't all blissfully happy.... my mom used to lock herself in the bathroom just to get away from me.


I know... something that cute couldn't possibly have been a handful. Right.

One fond memory I have growing up was playing in the kitchen while my mom cooked. What I didn't realize was this simple trick (which occupied my sister and I for HOURS) actually saved my mom's sanity and helped her to cook meals from scratch even with two hooligans running around.

Today's kitchen tip is brought to you by my mom....
Create a drawer in your kitchen for your children. My girls had their own drawer to play in while I was cooking. I filled the drawer with a large sheet (which I would spread on the floor of my U-shaped kitchen), and a 5 qt. ice cream bucket filled with rice and all sorts of items to fill, pour, mix, measure and stir the rice with.
When it was time for me to be in the kitchen, I'd spread the sheet on the floor and let the girls play with the rice and all the gadgets. When dinner was ready, I had the girls put the items in the drawer, and I would simply pick up the sheet and funnel all the rice back into the bucket. It was a simple and easy clean up and the girls loved it. That drawer was a life saver.
I know this is one mandatory drawer that will exist in my kitchen when little sous-chef's make their way into our life.

Linked to:

Honey Wheat Bagels

Every once and a while, a good bagel, toasted with cherry preserve is a wonderful breakfast. This morning, we decided to try whole wheat bagels.


This recipe is so easy! It's just a little time consuming -- about 2 hours from start to finish. But, it's worth it. Simple ingredients and a yummy result = a breakfast we enjoy!

Honey Wheat Bagels - From Laura @ Heavenly Homemakers

4 C whole wheat flour
2 1/4 tsp. yeast
1 1/2 C warm water
3 T honey + 1 T honey
1 tsp. sea salt


Combine 2 C flour, salt and yeast in a large bowl.


Then, add warm water.


Lightly spray your T with cooking spray, then add the 3 T of honey. If you spray your spoon first, the honey slides right off :) That's my kitchen tip!


Stir to combine, and stir in the remaining 2 C wheat flour.


Knead for ~10 minutes; then cover and allow the dough to rest for 10 minutes.

Meanwhile, bring a large stock pot of water to boil. Add in 1 T honey to boiling water.

Divide the dough into 12-16 pieces (depending on how large you want your bagels).

Create a hole in the center and shape into a bagel.

Let the bagels rest on a greased cookie sheet for 15ish minutes.


While the bagels rest, turn your oven on to broil.

Broil the bagels for 2 min/side.


When the bagels are broiled, place the bagels (about 4 at a time) into the big stockpot.


Boil them for 7 minutes; turning once about half way through.

Drain the bagels on a towel.


Then, bake at 375 for 25-30 minutes until lightly brown.


Allow them to cool just a little bit -- then enjoy.


You can freeze the ones that don't get eaten; they toast very nicely from the freezer.

These also make wonderful sandwiches for lunch -- a nice change from standard bread.

This post is linked to: