Showing posts with label Tuesday at the Table. Show all posts

Mint Chocolate Cookie Crunch


I think I've mentioned it before, but I get my love of baking from my mom. Each Christmas season, we'd spend hours in the kitchen baking unheard of amounts of Christmas goodies, singing Christmas songs. Memories like these are ones I cherish.

One of these such Christmas goodies we make is my mom's famous Mint Chocolate Cookie Crunch. She really is famous for them -- they were published in a Cookie Cookbook from Country Woman!!


What's wonderful about these... they are no-bake and can easily be made with little hands as helpers in the kitchen. I know I've posted this recipe before, but it's such a reminder of this time of year that I want to share it all with you again.

Mint Chocolate Cookie Crunch - Mom
{Print Recipe}

1 bag mint chocolate chips (or, Andes Mint Chips)
2 1/2 bags (or 5.5 C) dark chocolate chips (we LOVE Hershey's Special Dark!!)
1 pkg. Oreo cookies
4 C Rice Krispies

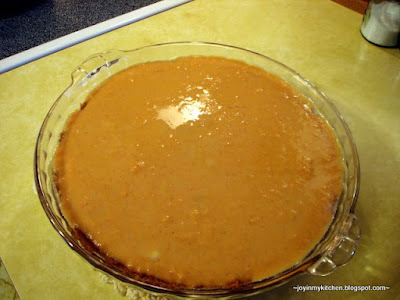
First, melt the chocolate chips (and mint chips) until just melted.


Then, finely crumble the Oreo cookies. We use a blender/food processor to do this, and purposefully leave a few larger random pieces.

Combine the Oreo, Rice Krispies and melted chocolates in a large bowl.


Stir until well coated.


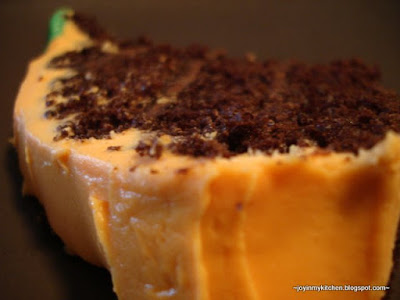
Using a spoon or an ice cream scooper, create cookies on top of waxed or parchment paper.


Then, lick the bowl :)


Allow cookies to harden up on the counter for a few hours before eating. This recipe makes 124 cookies! They are great to give as gifts, if you're willing to share :)

You can also easily cut the recipe in half. Use 1/2 a bag of Andes mints, 1 (12oz) bag of chocolate chips, 2 C Rice Krispies and a half a package of Oreos.

This recipe is posted to:

Italian Sausage Scramble


When we celebrated Thanksgiving and Christmas with my family a few weeks ago, we did a lot of sweet eating. Normally, I prefer a baked good breakfast (i.e., muffins, waffles, pancakes, etc) to an egg-based breakfast. But, Saturday morning, I was craving veggies and non-carbs!


I found some Italian chicken sausage (with cheese) in my mom's freezer -- she'd gotten them from Sam's Club, and got to work creating a yummy, healthy, non-carby breakfast.

Italian Sausage Scramble - Finding Joy in My Kitchen

3 Italian chicken sausages, sliced thinly
4 oz. mushrooms, sliced
3-4 stalks of asparagus, cut into 1-inch pieces
1 C broccoli, cut into small pieces
1 medium diced bell pepper (red, orange or yellow)
1 egg per person (in our case, that was 5)
1/4 C milk (or, less, if you're using less eggs)

Chop and prepare the veggies. Saute them in a pan, with a little bit of olive oil, if needed.


Meanwhile, saute the sausages in another pan until warmed and lightly browned.


Then, combine the sausage and veggies and saute together for about 5 minutes.


Mix the eggs and milk together (season with salt and pepper, if desired). Add the egg mix to the veggies/sausage.


Scramble until eggs are cooked to your liking.


Serve warm.


I have a feeling this would be yummy with a little cheddar cheese melted inside a tortilla!

This post is linked to:

Sweet Potato Pie


I love pumpkin pie.  But, I love my hubby more.  Seeing as he's allergic to pumpkin, we don't eat it in our house, and I haven't had a slice of it in ... too long.


This year, I tried a new pie -- Sweet Potato Pie -- and I love it.  I love it because it reminds me of pumpkin, but is more robust than pumpkin pie.  I love it because it's healthy -- sweet potatoes are good for you, you know.  I love it because my hubby can eat it too.  I love it because it has a yummy crust.  The crust is made from whole wheat molasses crinkles.... possibly the best crust ever.

For our first attempt, we used crushed cookies to make the pie crust.  After the pie was in the oven, I got to thinking that I should make the crust with the dough from the cookies, which would reduce the use of butter to get the cookies to stick together and form a crust.  I haven't actually tried this yet, but you can find my thoughts on how to do it under the * at the bottom of this post.    

Sweet Potato Pie with Molasses Crinkle Crust - SnoWhite

Crust
~8 large molasses crinkles*
1-3 T butter

Filling
1 can (12oz) evaporated milk
2 C sweet potato puree
1/2 C packed brown sugar
2 eggs
2 tsp. ginger
1 tsp. pumpkin pie spice
1/4 tsp. salt

Preheat oven to 350.

Crumble cookies into a medium sized bowl, and mix in butter until the cookies easily stick together.


Press into a pie plate. Be sure to get a little cookie up the side (mine could have gone up higher).


Pre-bake the crust just a little (this becomes especially important if you are using raw cookie dough to make the crust); about 10 minutes until lightly browned.


Meanwhile, combine the filling ingredients in a bowl.


Mix well.


Pour into the pre-baked crust. (and, now, turn up your oven to 425)


Place pie on a cookie sheet in the oven heated to 425.

Bake the pie for 15 minutes at 425, and then reduce the heat to 350.
Continue baking for about 45-50 minutes more.


Pie is done when the center is set (you can check this by cutting into the center of the pie).

Allow the pie to cool before serving.


Pie is best eaten within 2-3 days of making. :) But, it won't last that long.


*You can also use about 1/2-1 C dough pressed into an 8-inch pie plate to form a crust.  Pre-bake the crust for about 8-10 minutes, before adding the topping.

This post is linked to:

Lemon Bars


Betty Crocker Lemon Bars... simple, easy and tasty.


These were a special treat for a special birthday.


Lemon Bars - Betty Crocker

1 C flour
1/2 C butter (1 stick), softened
1/4 C powdered sugar
3/4 C sugar
2 tsp. lemon peel, grated
3 T lemon juice
1/2 tsp. baking powder
1/4 tsp. salt
2 eggs
additional powdered sugar, garnish

Heat oven to 350.

In a bowl, mix together the flour, 1/4 C powdered sugar and softened butter.


Press into a lightly greased 7x11 baking pan. Bake crust for roughly 15 minutes until lightly browned.


Meanwhile, beat together sugar, lemon juice, lemon zest, baking powder, salt and eggs for about 3 minutes, or until light and fluffy.


Pour mixture over the hot crust and return to the oven to bake for an additional 20ish minutes, or until middle is set and the top is lightly browned.


Dust with additional powdered sugar garnish.


Cut into bars to serve.


Mmmmm... lemon.


This post is linked to:

Halloween Cake


Yep. A pumpkin cake.


Cute, isn't it?


Festive with the chocolate cake and orange frosting, right?


I think so.


Not only on the outside...but on the inside too.


Yep. That's a candle in there.... for a nice Jack-o-Lantern Cake!

Jack-O-Lantern Cake - Adapted from Amanda

1 recipe chocolate cake
1 white cake mix (I used a store bought)
1 recipe chocolate frosting
1 recipe my favorite cream cheese frosting


Food coloring
Time
Freezer space
Patience :)

Begin by making the white cake mix into cupcakes. Reserve 1 C of the batter, and create 3 or 4 yellow cupcakes using your food coloring.


Bake according to package directions.


Then, when cupcakes are cooled. Choose the best looking ones (and the yellow ones) and freeze 'em for a few hours.


Meanwhile, make up one recipe of chocolate cake. Pour into 4 pans to bake. I used 2 8inch pans, a pie plate and a small Corningware dish.


Cool completely and freeze these guys too. Trust me. Stick them in the freezer for at least a good hour. They'll be much easier to work with!


Prepare the frosting (both the chocolate and the cream cheese one) so they are ready when you are!

Now... for the assembly directions:

1) Level each cake, if needed. I didn't have to do a lot of leveling with my cakes. You'll also want to level your 3 or 4 of your white cupcakes.

2) Place your cupcake on top of one of your layers of chocolate cake. Using a knife, carefully cut a hole into the chocolate cake. (When I make this again, I'm going to make the cupcakes smaller in diameter by cutting them down... I think having a smaller "candle stick" will help the candle effect in the middle of the cake).


3) Very carefully, pop the chocolate piece out of the center! Save these little guys!


4) Place the cut-out layer of cake on top of an the other remaining larger layer cake, and cut out a hole the same size in the second layer. In the third layer, cut a smaller hole... for the flame.


5) Next, place the cake on the serving platter you intend to use. Spread the layer with chocolate frosting.


6) Top with the second layer (the one you cut the middle out of!).


7) Frost the second layer next!


8) Take your leveled cupcakes, and carefully stuff them down into the cake.


9) Then, cut out a "flame" (i.e. diamond) out of the yellow cupcake. You might need to try a few times to get one you like ;-)


10) Place the third layer (I used the pie plate cake layer), with the smaller hole, on top of the cake. Then, stuff the "flame" cupcake into the top layer.


11) Using the final level, fit it over the top of the flame. Of course, frosting in between those layers!

12) Top with one of the cut-out holes... this is your stem!


13) Now... you have a pumpkin cake!


14) Freeze for at least an hour.

15) Frost with a thin layer of orange frosting. This will seal in the crumbs and make the final layer easier to put on.


Looks pretty, eh? Not quite. This is why it's called a crumb-coat. Wouldn't want this to end up on Cake Wrecks or anything....

16) Freeze again. Again, freeze for at least 1 hour.

17) Then, add the second layer of frosting over the "crumb" coat.


18) Add a green stem....


19) And, a face, if desired. (Amanda has a great face on her pumpkin)


20) Keep in the fridge until about 15 minutes before serving.


Then, slice and serve... and enjoy watching people's faces as they see the "lit" candle inside the pumpkin!


Yum-o.


This was the first cake that I really decorated!!! It was a blast -- and while I may not begin making wedding cakes anytime soon, it's fun to know I can kind-of-sort-of decorate a cake.

This post is linked to: