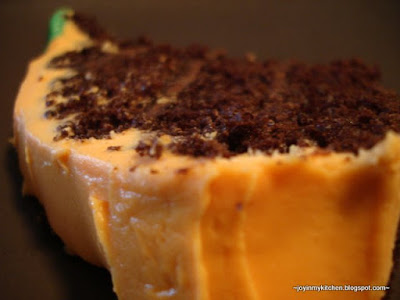
Yep. A pumpkin cake.
Cute, isn't it?
Festive with the chocolate cake and orange frosting, right?
I think so.
Not only on the outside...but on the inside too.
Yep. That's a candle in there.... for a nice Jack-o-Lantern Cake!
Jack-O-Lantern Cake - Adapted from Amanda
1 recipe chocolate cake
1 white cake mix (I used a store bought)
1 recipe chocolate frosting
1 recipe my favorite cream cheese frosting
Food coloring
Time
Freezer space
Patience :)
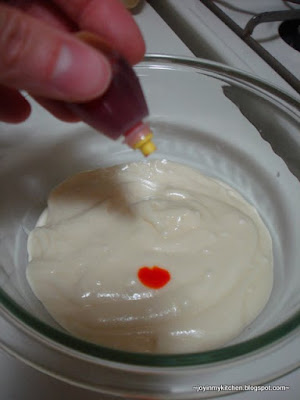
Begin by making the white cake mix into cupcakes. Reserve 1 C of the batter, and create 3 or 4 yellow cupcakes using your food coloring.
Bake according to package directions.
Then, when cupcakes are cooled. Choose the best looking ones (and the yellow ones) and freeze 'em for a few hours.
Meanwhile, make up one recipe of chocolate cake. Pour into 4 pans to bake. I used 2 8inch pans, a pie plate and a small Corningware dish.
Cool completely and freeze these guys too. Trust me. Stick them in the freezer for at least a good hour. They'll be much easier to work with!
Prepare the frosting (both the chocolate and the cream cheese one) so they are ready when you are!
Now... for the assembly directions:
1) Level each cake, if needed. I didn't have to do a lot of leveling with my cakes. You'll also want to level your 3 or 4 of your white cupcakes.
2) Place your cupcake on top of one of your layers of chocolate cake. Using a knife, carefully cut a hole into the chocolate cake. (When I make this again, I'm going to make the cupcakes smaller in diameter by cutting them down... I think having a smaller "candle stick" will help the candle effect in the middle of the cake).
3) Very carefully, pop the chocolate piece out of the center! Save these little guys!
4) Place the cut-out layer of cake on top of an the other remaining larger layer cake, and cut out a hole the same size in the second layer. In the third layer, cut a smaller hole... for the flame.
5) Next, place the cake on the serving platter you intend to use. Spread the layer with chocolate frosting.
6) Top with the second layer (the one you cut the middle out of!).
7) Frost the second layer next!
8) Take your leveled cupcakes, and carefully stuff them down into the cake.
9) Then, cut out a "flame" (i.e. diamond) out of the yellow cupcake. You might need to try a few times to get one you like ;-)
10) Place the third layer (I used the pie plate cake layer), with the smaller hole, on top of the cake. Then, stuff the "flame" cupcake into the top layer.
11) Using the final level, fit it over the top of the flame. Of course, frosting in between those layers!
12) Top with one of the cut-out holes... this is your stem!
13) Now... you have a pumpkin cake!
14) Freeze for at least an hour.
15) Frost with a thin layer of orange frosting. This will seal in the crumbs and make the final layer easier to put on.
Looks pretty, eh? Not quite. This is why it's called a crumb-coat. Wouldn't want this to end up on Cake Wrecks or anything....
16) Freeze again. Again, freeze for at least 1 hour.
17) Then, add the second layer of frosting over the "crumb" coat.
18) Add a green stem....
19) And, a face, if desired. (Amanda has a great face on her pumpkin)
20) Keep in the fridge until about 15 minutes before serving.
Then, slice and serve... and enjoy watching people's faces as they see the "lit" candle inside the pumpkin!
Yum-o.
This was the first cake that I really decorated!!! It was a blast -- and while I may not begin making wedding cakes anytime soon, it's fun to know I can kind-of-sort-of decorate a cake.
This post is linked to:
Home
»
chocolate
»
Chocolate Friday
»
Desserts
»
Food Network Challenge
»
Foodie Friday
»
halloween
»
Mouthwatering Mondays
»
Tempt My Tummy Tuesday
»
Tuesday at the Table
»
Halloween Cake


