Showing posts with label Rhubarb. Show all posts

Blueberry Rhubarb Muffins

Strawberries and rhubarb get all the attention.


Blueberries are an often-overlooked companion to rhubarb.  And, they happen to be my favorite pair for this tart veggie.


Combined together in a whole-wheat muffin - I can feel good about eating this deliciousness for breakfast.


It gives me the energy I need to spin my wheels thinking about our dining room dilema.  And, makes a great, antioxidant-rich breakfast with a cup of green tea.    


Blueberry Rhubarb Muffins - Inspired by Gina

1 C whole wheat flour
1 C white whole wheat flour
1/4 C sugar
1 tsp. baking soda
1/4 tsp. salt
1 C applesauce - all natural, unsweetened
1 egg, beaten
1 tsp. vanilla
1 T olive oil
3/4 C blueberries
3/4 C rhubarb, chopped


Begin by mixing the flours, sugar, baking soda and salt together in a large mixing bowl.  Stir until blended.


Slice up the rhubarb and combine with the blueberries.


Toss the blueberries and rhubarb into the flour mixture, and stir to coat.


In a second bowl or measuring cup, combine the applesauce, vanilla, egg and olive oil.


Add the moist ingredients to the dry ones stirring until muffin batter is just moist. This will take considerable (being careful not to burst the blueberries) stirring!


I almost added milk thinking -- "there's no way there's enough liquids in here", but with a little bit of patience, I got a thick batter.


Scoop the muffin batter into 12 lightly greased muffin tins.


I love using a cookie scoop for this -- so easy!


Bake these muffins at 325 for 25 minutes until a toothpick comes out clean when inserted into the center of a muffin.  These muffins will not be super brown when done, but don't judge the doneness by color.


Cool for 2-3 minutes in the muffin tins, and then remove the muffins to a cooling rack to finish cooling completely.
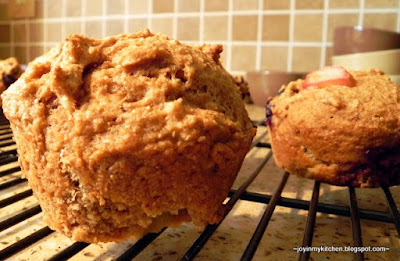

Enjoy!

And, don't tell the strawberry that you've found a new favorite.

Linked to: These Chicks Cook, Your Recipe, My Kitchen, Muffin Monday

Rhubarb Recipe Roundup

Our garden is overflowing with rhubarb --


From a few email questions lately, I realize many of you have questions about this delicious veggie.


Rhubarb is high in vitamin C, fiber and calcium.  It's an excellent spring veggie to use in desserts.  Yep - you can get your veggies from dessert :)


First things first -- the leaves of the rhubarb have high levels of oxalic acid, a plant secondary compound that is toxic to humans.  Thus - DO NOT EAT THE LEAVES.

Next, look for stalks that are firm and red in color.  Just as you would snap celery off of the bunch of celery, snap the rhubarb stalk off of the plant.  You can do this by grabbing the stalk right as it comes out of the ground and use a slight twist/turn/pull method to remove the stalk.  

Sometimes I cut off the stalk, but it is better for the plant to snap off the whole petiole (the botanist term for stalk).


Finally, Cut off the leaves and discard.

Wash the stalks well and prepare for use.


Rhubarb is one of the first veggies available in the spring and should be harvested in May and early June. As the summer continues, the stalks tend to get more hollow and dry.  

You can harvest petioles daily, but don't take more than 1/3 of the petioles from any given plant in one harvest.  


Once you have the rhubarb harvested you can slice the rhubarb and freeze it for later use.  You can blanch the veggie, or, just dry freeze it by placing the sliced rhubarb in an airtight container.

Rhubarb is likely most famous for strawberry rhubarb pie, but rhubarb also makes a stunning rhubarb wine.

Here are a list of our favorite rhubarb recipes:

Desserts


Preserves
Strawberry Rhubarb Jam

Breakfasts
Strawberry Rhubarb Muffins
Blueberry Rhubarb Muffins


How do you like your rhubarb?  Have you ever tried rhubarb?  Does it grow where you live?  I'd love to hear!

Linked to: Tempt My Tummy Tuesday, Kitchen Tip Tuesday, Works for Me Wednesday, Slightly Indulgent Tuesday

Strawberry Rhubarb Jam

If you are looking to put some of that rhubarb in your garden to good use, make this jam right away!


Strawberry and rhubarb is about as classic a combo as they come - think peanut butter meets jelly.  Only better.  Wrapped up in this easy-to-make jam, these two are a delightful combination.  Perfect for wheat buttermilk breadyogurt, ice cream, pancakes, or even that PB and J {if you're not allergic to peanuts}.   


Strawberry Rhubarb Jam - Adapted from One Perfect Bite

4 C rhubarb
3 C strawberries
1 1/2 C sugar
1 T lemon juice

Begin by dicing up the washed strawberries and rhubarb.


Add the strawberries and rhubarb to a large sauce pan.  Drizzle in the lemon juice.  Then, add the sugar. 


Stir to coat.  


Heat the fruit veggie mixture over medium high heat until boiling.  Stir occasionally   


Allow the mixture to cook at a slow boil over medium-low heat for about 1 hour.  After 1 hour, remove a spoonful and place it on a chilled plate or small chilled bowl.  


If the jam pretty much stays put and doesn't run at the edges, the jam is done.  If it's a little runny around the edges, cook for 5-10 more minutes and check again.  


Allow the jam to cool slightly in the pan, about 20 minutes.  Then, transfer into a canning jar or other storage container.  Store in the refrigerator, and use within 2 weeks.  


I placed the remaining jam into a freezer safe container, and froze the rest!  Alternatively, you can actually can the jam using the procedure Mary shares with the original recipe.  


We loved this jam -- especially on buttermilk pancakes.  I'm excited that I was able to successfully reduce the sugar in the recipe and get a jam that we enjoyed.  

Linked to: Somewhat Simple, Fun with Food Friday, Your Recipe, My Kitchen

Pineapple Strawberry Rhubarb Crumble


Our garden is overflowing the rhubarb right now!  And, strawberries are just about in season here too.  So, combining this veggie and fruit with sweet pineapple made for a delightful {and easy} dessert!


Pineapple Strawberry Rhubarb Crumble 


1 box yellow cake mix {or, make your own}
1 lb. strawberries, diced
4 stalks rhubarb, sliced
1 can (large) crushed pineapple
2 T butter

Begin by tossing the rhubarb and strawberries together in a large bowl.


Pour the crushed pineapple into the bottom of a lightly greased 9x13 glass baking dish.


Add the strawberry mixture over the top.


Then, dump the cake mix over the top of the fruit.


Spread out until smoothed.


Slice the Ts of butter very thin, and lay them over the top of the cake.


Bake at 350 for 45 - 55 minutes, until the fruit layer is bubbling and the top is lightly browned.


Serve warm, or at room temperature.


This post is linked to: Tempt My Tummy Tuesday, Tasty Tuesday (1), Tasty Tuesday (2), Full Plate Thursday, Sweets for a Saturday, Family Friendly Fridays, Potluck Sunday, Sweet Tooth Friday


Rhubarb Gingersnap Cheesecake


I've never made cheesecake before because it's not my most favorite dessert.  But, when I spied this recipe from CookinCanuk at Tasty Kitchen, I didn't even hesitate thinking about making it!


I knew this would be a cheesecake I would love.


And, I enjoyed every bite!


I must warn you: this recipe takes time to make -- a minimum of 6 hours before it's ready to eat.  Patience, my heart.  Patience.  I hear that's a good thing.  They've obviously never been waiting on this cheesecake.  

Oh, and just in case you were wondering, I made this entire thing in my toaster oven!  No heating up the kitchen for me!


Rhubarb Gingersnap Cheesecake - Adapted from CookinCanuk
{Print Recipe}


Crust
5 T butter, softened
1/2 C brown sugar, packed
1 egg
1/8 C molasses
1 1/4 C white wheat flour
1 tsp. baking soda
1/8 tsp. salt
1/4 tsp. cloves
1/2 tsp. cinnamon
1/2 tsp. ginger


Filling
2-8oz pkgs. cream cheese (I used reduced fat)
2/3 C sugar
2 eggs
1/4 C light sour cream
1 tsp. vanilla


Rhubarb Toppings
1/2 C sugar
1/2 C water
4 C rhubarb (cut into 1/4 inch pieces)

You'll begin by making the crust.  Cream together the butter, sugar, molasses and egg in a large mixer.


Meanwhile, mix together the flour, soda, salt and spices.  Add slowly to the creamed mixture and mix until moist.

Spread 3/4 of the dough into the bottom of a 9x9 square baking dish that has been lined with tinfoil and lightly sprayed.


Bake at 350 for 10-12 minutes, until the crust is lightly browned.  Use the remaining dough to make cookies :)  


Allow the crust to cool for 30 minutes.  While it's cooling, prepare the rhubarb topping.

In a saucepan, combine the water and sugar and heat over medium heat until the sugar is dissolved.


Then, add in the rhubarb.


Allow the rhubarb to cook in the sugar-water mixture for 7-10 minutes, until the rhubarb is soft and breaking apart.  Remove from the heat and allow the mixture to cool.

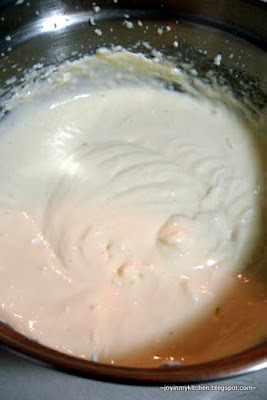
Next, you're ready for the cheesecake.  Whip slightly softened cream cheese with a mixer for 3-4 minutes until fluffy and smooth.


 Then, whip in the sugar, eggs, sour cream and vanilla.


 Mix until creamy and no lumps remain.


 The key to getting lump-less cheesecake... make sure your cream cheese is soft before you start!  I set my cream cheese out of the refrigerator when I put the crust into the toaster oven, and it was perfect when I went to make the filling (mind you, it was pretty warm out/in my apartment).


Now you're ready to assemble the cheesecake.  Pour the filling layer over the top of the cooled crust.


 Then, take a slotted spoon and spoon the rhubarb topping over the filling.


 Use a knife to gently swirl the rhubarb topping into the cheesecake.  No need to use all the topping; reserve about 1 C, or whatever looks good.  


{so... it didn't swirl beautifully... but you get the idea}

Bake the cheesecake at 350 for 35-40 minutes.  15ish minutes in, rotate the pan in the oven.  After 40 minutes, the edges should be set, but the center will be "jiggly".


 That's great (as long as it's not wiggling all over the place).  Remove the cheesecake from the oven at this point and cool it on a wire cooling rack for 2 hours.


When the two hours are up, place the cheesecake, covered, into the refrigerator.  Chill for at least 3 hours, or up to 24 hours before cheesecake is set and ready to eat.  I chilled mine for about 5 hours and found it to be perfect.


Cut into 16 bars.


Enjoy each slice drizzled with some of the remaining rhubarb topping.


The cheesecake keeps well in the fridge... we're going on 5 days now, but I don't think there will be too many pieces left very much longer!

Photobucket

This recipe is linked to: