Showing posts with label bars. Show all posts

Chocolate Chip Cookie Dough Topped Brownies

Once upon a time a very nice friend stopped by with a plate of treats for me.  I was supposed to only be eating treats once-a-week, but once I laid my eyes on these freshly baked goodies, there was no way I was waiting and risking them getting eaten before I had a chance.  I figured that since I'm trying to cut down, that I'd only eat half of what I'd normally eat, so I cut all the pieces in half, then ate just half the plate.  Yes, I know...my willpower is admirable. 

 It wasn't very long later, that I was obsessing over how much I enjoyed my previous exercise in self-moderation with these brownies, that I decided to try and make them again (you know for more willpower practice...)  I was sure that I could easily reproduce them myself, so I just used my own brownie and cookie dough recipes.  FAIL.  They were too rich even for me.   Alas after two unsuccessful tries (both too rich), I gave up and just asked my friend Angela for her recipe, then of course had to make them one more time just to make sure I remembered how good they were.  Finally SUCCESS! Now lucky you!  You get to reap the benefits of Angela's kindness and my OCD need to perfect my willpower (and for finding a new treat worthy of posting here on Recipe Shoebox).   Enjoy!!!!


Oh yay, I love a happy ending {and a good dessert}! 
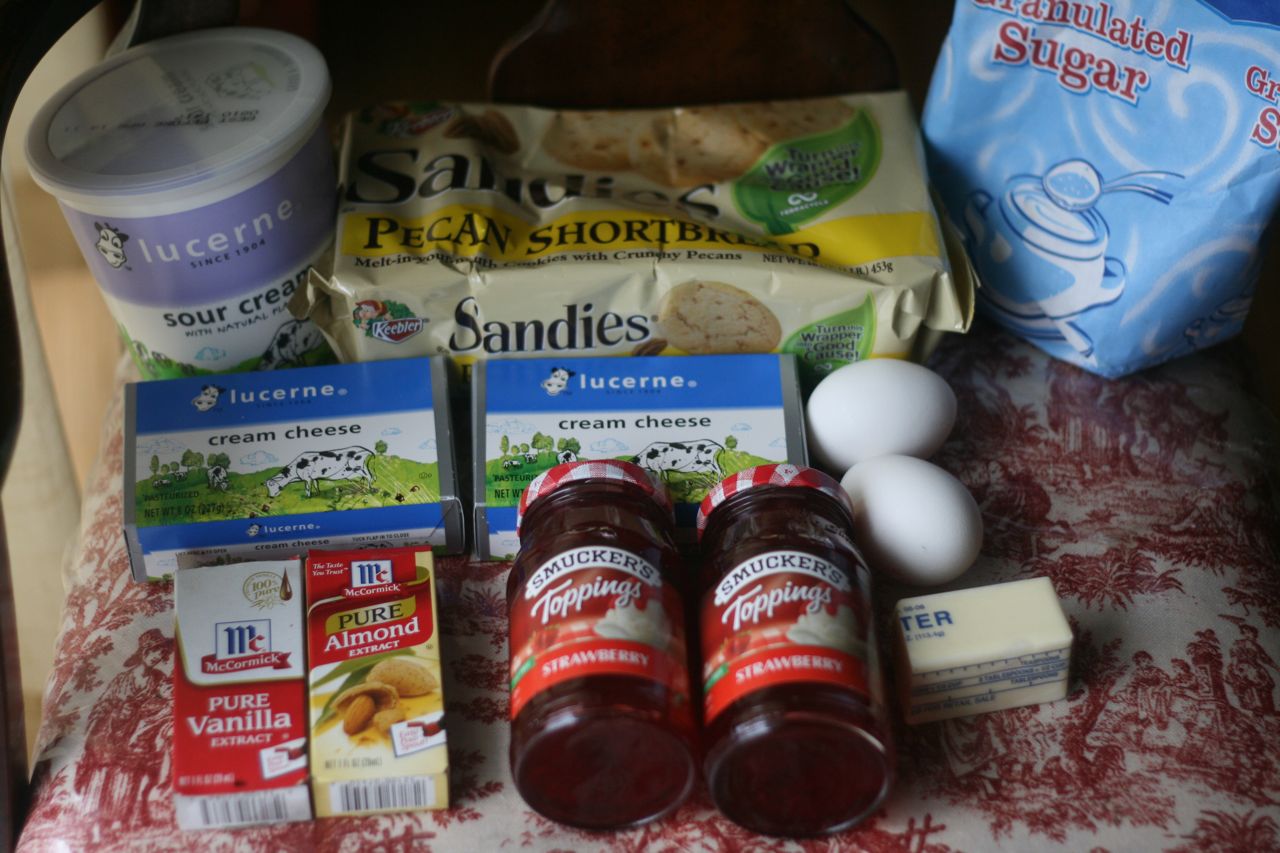
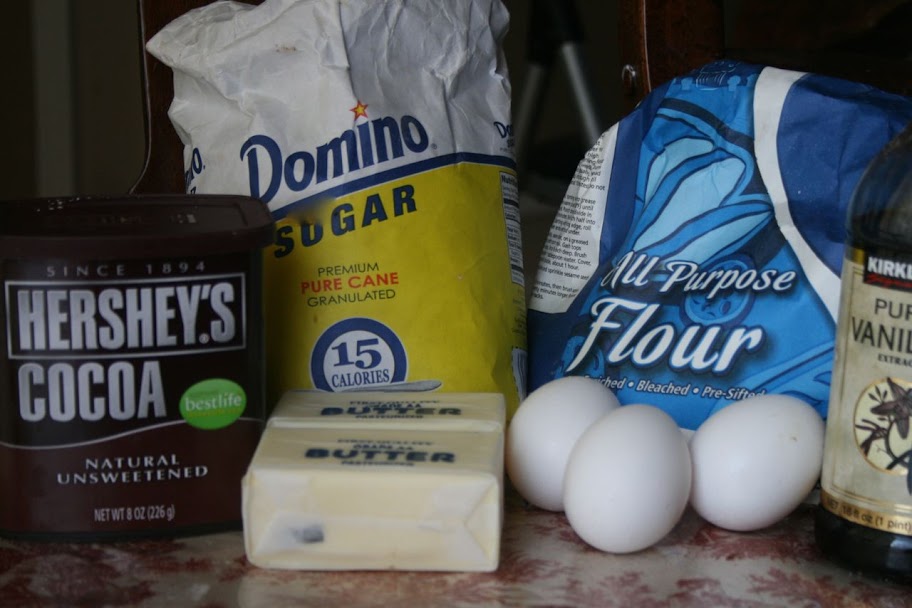
Click here for printable recipe. 


The ingredients:

1 9x13-inch pan of baked brownies  (your favorite recipe or mix--Betty Crocker dark chocolate brownie mix was good.)
1/2 cup butter, softened
1/2 cup dark brown sugar
1/4 cup sugar
3 Tbs. milk
1 tsp. vanilla
3/4 cup all-purpose flour
pinch of salt
1 cup semi-sweet chocolate chips


Directions: 
Bake brownies as per directed, adding a cup of dark chocolate chips to the batter, if desired.     Mix together cookie ingredients until well-combined.  Spread over cooled brownies.  Makes 24 very evil brownies!

Enjoy! 

****************

Don't miss a single recipe, sign up (on the right) for email updates. 

Strawberry Cheesecake Bars

Cheesecake + strawberry sauce.  How can you go wrong with that combination?  These easy-to-make bars were as pretty, with their pink swirls, as they were tasty.  If you're looking for an impressive dessert to serve guests, then look no further...this recipe from Our Best Bites cookbook fits the bill perfectly!   Enjoy! 
Click here for printable page. 

The ingredients:
1 package (16-ounces) Pecan Sandies cookies, divided
1-1/2 Tbs. butter, melted
11 ounces cream cheese, softened (not low-fat)
2 eggs
2/3 cup sugar
pinch salt
1-1/2 tsp. vanilla
1/2 tsp. almond extract
2 cups sour cream
1-1/4 cups strawberry ice cream topping or pie filling (plus more for drizzling over the finished bars, if desired)

Directions:
Preheat oven to 375 degrees.  Spray a 9x13-inch baking dish with nonstick cooking spray.  In a food processor, process all but six of the Pecan Sandies.  Mix with melted butter and lightly press onto the bottom of the pan.  Set aside. 

In a large bowl, combine the cream cheese, eggs, sugar, salt, vanilla, almond extract, and sour cream.  Beat on high for 4-5 minutes. 

Spread half of the cheesecake batter over the Pecan Sandie crust. Pour 3/4 cups of the strawberry ice cream topping over the cheesecake batter.

NOTE:  Don't worry--It doesn't need to look pretty.

Spread remaining cheesecake batter over the strawberry layer and then spoon the 1/2 cup strawberry ice cream topping over the batter. 

Being careful not to cut into the surface of the cookie crust, swirl the strawberry mixture with a butter knife. 
Bake for 25-35 minutes or until center is jiggly, but not liquid.  While baking process remaining 6 cookies.  During the last 10 minutes of baking, sprinkle the cookies on top of the cheesecake.  Chill for at least 8 hours and cut into squares.
 
If desired, drizzle remaining strawberry sauce over the individual squares.  Enjoy!
 

Key Lime Bars

I first sampled these tangy, but cool and creamy bars at a baby shower for a good friend.  I’ve always loved key lime pie, so it was no surprise that these easy bars struck such a chord with me.  After tracking down the recipe from my friend Alex, who had gotten the recipe from Cook’s Illustrated, I was determined to give them a try at home.  They came together in a jiffy and ended up being every bit the citrusy taste of spring I had been hoping for!   They would make for a great party food, since they’re simple to make and hold up well (once they’ve been refrigerated).  In addition, this recipe doubled fits just perfectly into a 9x13-inch baking pan.  Enjoy! 
Click here for printable recipe.

The ingredients:

CRUST: 

1-1/4 cups crushed animal crackers (about two and a half of the little 2 ounce boxes)
3 Tbs. brown sugar
pinch of salt
4 Tbs. butter, melted and cooled slightly


FILLING: 

2 ounces cream cheese, room temperature
1 Tbs. grated lime zest, minced
pinch of salt
1 can (14-ounces) sweetened condensed milk
1 large egg yolk
1/2 cup freshly squeezed lime juice


GARNISH:

3/4 cup shredded sweetened coconut, toasted until golden and crisp


Directions:
  Preheat oven to 325 degrees.  Line 8x8-inch baking pan with foil , folded and hanging over the sides (so that the overhang can later be used as handles in removing the bars from the pan).  Spray foil with non-stick cooking spray.    (NOTE:  recipe can be doubled  and baked in a 9x13-inch baking pan if desired)


For making the crust:  In a large bowl (or in the blender jar if a blender was used to crush the animal crackers),  add the crushed animal crackers, brown sugar, salt and stir well.  Stir in melted butter.  Press crumb/butter mixture evenly and firmly into bottom of foil-lined pan.  Bake until deep golden brown, 18-20 minutes.  Set aside and allow to cool, while you prepare the filling. 

For making the filling:  While crust cools, in medium bowl, stir cream cheese, lime zest, and salt with rubber spatula until softened, creamy, and thoroughly combined.  Add sweetened condensed milk and whisk vigorously until incorporated and no lumps of cream cheese remain; whisk in egg yolk.  Add lime juice and whisk gently until incorporated. 

Pour filling into baked crust; spread to corners and smooth surface with rubber spatula.  Bake at 325 degrees until set and edges begin to pull away slightly from sides, 15- 20 minutes.  Cool at room temperature for 1 to 1-1/2 hours.  Cover with foil and refrigerate until thoroughly chilled, at least 2 hours. 

Loosen edges with knife and lift bars from baking pan using foil "handles"; cut bars into 16 squares.  Sprinkle with toasted coconut, if using, and serve.  Store in refrigerator.  Makes 16 bars (or 9 if you want them to be big). 


Enjoy! 

Berry Swirled Fudge Brownies

If you’ve been  looking for a delicious Valentine treat for your sweetheart, then look no further!  These rich, fudgy brownies swirled with the fresh tartness of fruit preserves was simply an out-of-this-world combination and is sure to melt your sweetie into putty in your hands in no time!  °Ü° This tantalizing, but easy enough for my daughter to make, dessert came from Reeni at Cinnamon Spice and Everything Nice !!     Happy Valentine’s Day (tomorrow)! 

Click here for printable recipe.

The ingredients:

3/4 cup butter, melted
1/2 cup  cocoa
1-1/2 cups sugar
3 eggs
1-1/2 tsp. vanilla extract
3/4 cup all-purpose flour
1/4 tsp. salt
1/2 cup walnuts or pecans, chopped, optional (we omitted the nuts)
heaping 1/3 cup cranberry sauce or other type of berry jam/preserve
1/2 cup chocolate chips, for topping

Directions:  
Preheat oven to 350°F. Grease and line a 9x13 inch baking pan (for thin brownies) or an 8x8 inch pan (for thicker brownies) with  parchment paper.

In a large bowl, add cocoa powder to melted butter. Add sugar and mix well. Add eggs, one at a time, beating well after each addition. Stir in vanilla, flour and salt. Do not overbeat. Fold in nuts (if desired).

Spread in prepared pan, drop cranberry sauce/preserves by the spoonful over top and use a knife to swirl into batter.

Bake (9x13) 28-30 minutes, (8x8) 36-38 minutes. Cool on wire racks. Melt half the chocolate in a small saucepan or in the microwave, remove from heat and stir in the remainder of the chocolate until melted. Drizzle over top using a spoon or a baggie with the corner cut off. Remove to cutting board and cut into squares, wiping knife clean after each cut.


Enjoy!


This post is linked over at Sweets For a Saturday at Sweet as Sugar Cookies and at Sweet Tooth Friday at Alli-N-Son!  

Holiday Baking #27: Apple-Raspberry Streusel Bars

Twenty-seven straight days of goody recipes and I can officially say that I am almost goodied out.  I'm definitely looking forward to sharing some yummy dinner and side recipes again with you all soon!  In the meantime, I've still got a few more goodies to go to finish out my "Baking through the Holidays with Recipe Shoebox" commitment (or according to my husband "admin likes self-inflicted stress"   commitment) These easy apple-raspberry bars were quite tasty with the  combination of tart and sweet flavors and would be a perfect to share on a plate of goodies or for a tasty, unique dessert. 

Click here for printable recipe. 

The ingredients:


CRUST and STREUSEL:
2 cups uncooked oats (quick or old-fashioned)
2-1/2 cups all-purpose flour
1-1/4 cups sugar
2 tsp. baking powder
1 cup butter, melted

FILLING:
3 cups peeled, chopped tart apples (Granny Smith worked well)
2 Tbs. all-purpose flour
1-1/2 cups raspberry preserves

Directions:
Heat oven to 375°.  For crust and streusel topping, combine oats, flour, sugar, and baking powder; mix well.  Add butter, mixing until moistened.  Reserve 2 cups; set aside.  Press remaining oat mixture onto bottom of 9x13-inch baking dish.  Bake 15 minutes or until light golden brown. 

For filling, combine apples and flour.  Stir in preserves. 

Spread onto crust to within 1/2-inch of edges.  Sprinkle with reserved oat mixture, pressing lightly. 

Bake 30-35 minutes or until light golden brown.  Cool completely; cut into bars.

  Store tightly covered. 

Enjoy!

Holiday Baking #12: Peppermint Patty Brownies

Ah, the winter sicknesses have invaded our family this weekend....in a double dose.  One child is down-and-out with a fever and cough and the other one is down with a stomach bug.    I'm really hoping that we don't have to take turns having both bugs go around the house....ugh!   


Onto better and brighter subjects now...these peppermint patty brownies!  You can probably tell from the ingredients that there is nothing not to love about these rich, fudgy, minty goodies (except maybe for how decadent they are).  Chocolate and mint are one of my favorite flavor combinations anyway and the way they came together in this delicious holiday indulgence was a winner in my book! 

Click here for printable recipe. 

The ingredients:

1-1/2 cups butter
3 cups sugar
1 Tbs. vanilla
5 eggs
2 cups flour
1 cup unsweetened cocoa
1 tsp. baking powder
1 tsp. salt
24 small peppermint patties


Directions:

Beat butter, sugar, and vanilla together until well mixed.  Add eggs and beat until blended.  Stir in flour, cocoa, baking powder, and salt.  Mix well. 
Reserve 2 cups of batter.  Set aside.

Spread the remaining batter into a well-greased 13x9-inch baking pan. 

Arrange peppermint patties in a single layer over batter (about 1/2 inch apart).  (a good job for the kids)
Spread reserved 2 cups batter over patties. 

Bake at 350° for 50 minutes or until brownies begin to pull away from sides of pan.  Cool completely before serving.  Enjoy!  


NOTE:  If you're ever making these in autumn, you can get the peppermint patties that are colored orange for Halloween.  It makes for a pretty autumn colored brownie! 

*******************
Don't forget to grab my button...

Recipe Shoebox