Showing posts with label Rise and Shine Mornings. Show all posts

Back to the Future in Rural Ontario and World-Famous Pancakes


On a recent trip to Ontario I travelled some of the roads around Cambridge with my sister at the helm enroute to the pretty towns of St. Jacobs and Elora. Located just north of the cities of Kitchener and Waterloo, St Jacobs has an old fashioned feel. The village has a population of around 1,400 people and is famous for its Farmers’ Market. We used to love to shop on the main street in the unique gift shops there but sadly over the years this has declined and lost a lot of its charm. It is still however a destination of choice to spend a few hours at the St. Jacobs Farmers Market on a Saturday morning. The best thing about St. Jacobs that always blows me away is their marketplaces located in the giant barn structure. They have everything from maple syrup and honey products to a meat section of rolls of summer sausage and links that are smoked over maple wood for one week then cured for two, slabs of peameal bacon and Waterloo’s local delicacy, pig tails slathered in barbecue sauce that cook up like ribs. There are good reasons to elbow your way through the crowded, narrow aisles, apple fritters, peameal bacon on a bun, but the best being Montforte artisanal sheep and goat’s milk cheeses, the chocolate and red-pepper chèvre is sinfully delicious.


 St. Jacobs is surrounded by a patchwork of fields and farms. As you wander the highways and byways watch for "slow-moving vehicle" signs, because you will be sharing the roads with Old Order Mennonite horse-drawn buggies and wagons. Today, the rural areas around St. Jacobs are populated with many Old Order Mennonite farmers who retain the religion, customs and lifestyle of their 19th century forefathers. Hand-written signs advertising a variety of things for sale from maple syrup, potatoes, brown eggs to quilts and crafts will be seen at the end of farm lanes. Roadside stands with produce and flowers will be unattended, people trust customers to leave money in the plastic containers provided, to pay for the things they buy. A visit here is like falling into a scene from Little House on the Prairie where on many farms, the family vehicle is still a horse-drawn wagon. Years ago on my first real exploration of the area, I learned to appreciate that this is very nearly a locavore’s fantasy land.

 In St. Jacobs, the Old Order Mennonites live very similar to the Amish. The Mennonites trekked from Pennsylvania in Conestoga Wagons and settled in and around St. Jacobs in the late 1700s and early 1800s, making St. Jacobs one of the original Mennonite settlements in Ontario. These delicate, quiet and private people live their lives in a traditional way and don’t care much for the conveniences of modern life like cars and electricity. You can tell the Mennonite farms by the lack of power and telephone lines running to their homes.


 I felt like paparazzi with my camera taking photos of horse drawn buggies and carts, women in bonnets and rural life trying all the while to be discreet. Travelling along the Mennonite Highway, the local nickname for Lobsinger Line, we were driving slowly, for not only will you pass several horse-drawn carriages, but nearly every farm gate will entice you with a different treat... free-range eggs, maple syrup, vegetables, cut flowers, fresh-baked pies, drug-free sausages and meats. I couldn't resist stopping at a local farm for maple syrup where a young mother and her too adorable little girls were washing their buggy. Their long skirts were muddied and wet from the effort, but on such a hot day the cooling water was surely a relief while wearing their long skirts and bonnets. I was ushered up to the house where the handcrafted furniture was threadbare and simple by today's standards. While visiting their farms, you will return to the past where everything looks like if did a hundred years ago.


But it’s time to head back to the village of St. Jacobs, for late-afternoon butter tarts and cream puffs at the Stone Crock Bakery, which also sells fruit pies, cakes and breads. Next door, the Farm Pantry carries locally famous Kountry Kitchen preserves...chili sauce, pickled beets, medley of garden vegetables, jams all made by a Mennonite woman from West Montrose where just for fun, you can swing east to drive through the Kissing Bridge, the last covered bridge in Ontario.

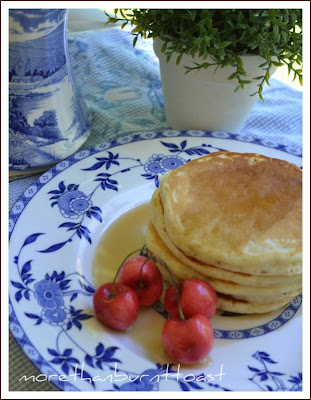
The maple syrup I purchased on a hot, dusty muggy day in rural Ontario is featured in todays pancakes. I was lucky enough to win a copy of "Notes From My Kitchen Table" by Gwyneth Paltrow from Dominic over at Bealleau's Kitchen, a blogging friend from "across the pond" in Lincolnshire, which takes me back to my own roots in England. This is the British marketed version of My Father's Daughter .

Of this recipe Gwenyth says, "Now if there is one image of my father that is the most "him", that is to say that encapsulates all of his elements and delivers them in one picture, it would be him over his cast-iron griddles making his world-famous pancakes.  These things have been legendary in our house for decades.  He first got the recipe out of Joy of Cooking and adapted it over and over the years to utter perfection.  The recipe below is so truthful to his pancakes that it's almost hard for me to eat them. I keep expecting him to walk into the kitchen."

Are they the best darn pancakes I have ever had? They are pretty close!


**Bruce Paltrow's World-Famous Pancakes**
recipe from Notes from My Kitchen Table by Gwyneth Paltrow

 (Remember, the batter is best if you make it the night before!)
  • 1 1/2 cups (350 g) unbleached all-purpose flour
  • 3 tablespoons (75 g) sugar
  • 1 3/4 teaspoon baking powder
  • 1 teaspoon salt
  • 3 eggs (preferably organic)
  • 3 tablespoons unsalted butter, melted and cooled slightly, plus 1/2 tsp per batch to grease pan
  • 1 1/2 cups (750 mL) buttermilk
  • About 1/2 cup (350 mL) whole milk
  • Maple syrup
1. Combine flour, sugar, baking powder and salt in a bowl. Whisk eggs, 3 tablespoons butter and buttermilk in another bowl. Whisk wet ingredients into dry ingredients until just combined. (Small lumps are fine.)

 2. Cover batter and let rest overnight in the refrigerator.

 3. Heat a large greased griddle or large nonstick skillet over medium heat. Add milk to batter until it reaches desired consistency; the more milk, the thinner and more delicate the pancakes.

 4. Working in batches of three pancakes, spoon batter onto griddle or skillet. Cook until surface of pancake is covered with bubbles, 2 to 3 minutes. Flip and cook the other side until golden, 2 to 3 minutes.

5. Drizzle warmed maple syrup over pancakes; serve.

 Serves 6


Back to The Future

Over four years of blogging I have found many wonderful recipes to share on these pages. Some from my own kitchen, some from your creative blogs and web sites, and some from well known celebrities and chefs. I was feeling a little nostalgic and was browsing these very pages just the other day, creeping back to the very beginning in 2006 when More Than Burnt Toast was in it's infancy and know more than "knee high to grasshopper". We all have those stellar recipes from when we first started when we were lucky enough to find one comment and have maybe one reader; in my case even before I was taking photos of the dishes I prepared.

 So here are a couple of flashback recipes from the very first baby steps here at MTBT with...

 
You are reading this post on More Than Burnt Toast at http://goodfoodcorner.blogspot.com. Excerpts and links may be used, provided that full and clear credit is given to the author and or owner of More Than Burnt Toast. All rights reserved by Valerie Harrison.

Lox and Bagel Cheese Strata for Invite a Blogger to Your Table


Through blogging we are given so many opportunities and heartwarming collaborations with people from all over the world. I learned about Norene Gilletz from my kindred spirit Giz of Equal Opportunity Kitchen whom I met in "real time" a few years ago in San Francisco. During my recent trip to Ontario to see my family we spent some time in the kitchen in her Toronto area home and this is our adventure. Also check out Giz' take here as well.

Norene Gilletz started writing and publishing cookbooks in Montreal in the 1960s and over the years has continued to specialize in healthy cooking. This past week I was fortunate to spend some time in Giz's beautiful Toronto area kitchen chopping, slicing, grating and baking our way to a delicious and healthy dish that will definitely show up back here in British Columbia in the near future. Giz brought up her two kids on Norene Gilletz' cookbooks. We chatted till the wee hours of the morning, sipped British Columbia wine and survived the hottest and muggiest day in Toronto on record since the 1940's!! In her living room, with the pitter patter of little doggy feet, I browsed through Norene's latest cookbook Norenes Healthy Kitchen. Once I returned home a further search  brought me to Norene's website Gourmania, "for people who are crazy about food!" 

 Giz and Norene have a lot in common. Both born in Winnipeg, Manitoba and both with a passion for cooking healthy meals and helping others through their charitable works. Not only does Norene create healthy and delicious ideas she uses her cooking demonstrations, lectures and cookbooks as fund-raising tools for many charitable organizations. You can check out Giz' website here at Blue Marigold Designs.

For the past 11 years Norene has lived and worked in Toronto which is home to a vibrant and diverse Jewish community where as the leading author of kosher cookbooks in Canada she is a highly sought after culinary consultant, cooking teacher/lecturer, cookbook author, and freelance food writer, with a big focus on healthy cooking. 

When Giz asked me to join her in making this dish  in her own kitchen for Invite a Blogger to Your Table on my recent trip back home I was thrilled!!! After a fabulous dinner at a local restaurant with local area bloggers (more about that later) we drove out to her home on the outskirts of town and prepared this dish side by side for the following morning. The dish sits overnight in the refrigerator ready to be baked to golden deliciousness whenever you crawl out of bed. We used Dempsters Thin Bagels and smoked salmon (lox) for a mouthwatering casserole that's perfect for feeding your family and yet special enough for guests. Also in the photo above you will find Giz' exceptional perogies found on her site.  "Every cook puts his or her own mark on a dish," Noreen says. "If you give someone a recipe, they'll always put their own twist on it. There's a certain chemistry between the cook and the ingredients."

Your assignment, if you choose to accept it, is to "Invite a Blogger to Your Table"! This is a fun event and an outlet for us each to challenge ourselves and create stronger bonds within the blogging community. Nothing is more intimate, or more effective at creating friendships than cooking and sharing meals together, even if it is virtually. But hey, if you live in the same area as another blogger what's to stop you from gathering in your own kitchen for this challenge as Giz and I did and work some magic!!!


If you have been following More Than Burnt Toast you will know that I have been creating personal challenges to infuse new life into my cooking adventures. Even every day food should always be an adventure either with new ideas, or experimenting with a new cuisine. With these personally imposed challenges my own culinary skills have been rejuvenated and back on track and I am once again inspired. With this ongoing event I will challenge myself and one blogging friend at a time throughout the year as the seasons change. I hope this inspires you to make new friends in the blogging community as well as create something you have been itching to try.

Your choice of recipe can be anything you would like it to be. Is there something you have been wanting to make and need feedback and encouragement from a friend to create on your blog? Is there a special dish that you just have to share sweet or savoury? Do you just want the fun of collaborating with other bloggers to come up with a tasty dish you feel you and your readers might enjoy. This is a fun event that creates friendships throughout the blogosphere. Invite someone you have followed for years or a perfect stranger. It is up to you!

Norene's motto is "Food that's good for you should taste good!"

Back to The Future

Over four years of blogging I have found many wonderful recipes to share on these pages. Some from my own kitchen, some from your creative blogs and web sites, and some from well known celebrities and chefs. I was feeling a little nostalgic and was browsing these very pages just the other day, creeping back to the very beginning in 2007 when More Than Burnt Toast was in it's infancy and know more than "knee high to grasshopper". We all have those stellar recipes from when we first started when we were lucky enough to find one comment and have maybe one reader; in my case even before I was taking photos of the dishes I prepared.

So here are a couple of flashback recipes from the very first baby steps here at MTBT with...
Val's Rhubarb Cheesecake
Lani's Broccoli Mandarin Salad

**Lox and Bagel Cheese Strata**
from Norene's Healthy Kitchen
  • 5-6 whole-wheat or sesame bagels, cut in bite-sized pieces (about 8 cups - if using the thin bagels you will need 10 -12)
  • 8 oz (250 g) lox (smoked), cut in bite sized pieces
  • 8 oz low-fat Swiss and/or Havarti cheese (about 2 cups grated)
  • 2 green onions, chopped
  • 2-3 Tbsp minced fresh dill weed
  • 6 large eggs (or 4 eggs plus 4 egg whites)
  • 1 cup light sour cream or plain yogurt
  • 2 cups milk (skim or 1%)
  • 1/2 tsp salt (optional)
  • 1/4 tsp freshly ground black pepper
1. Spray the bottom and sides of a 9x13 inch baking dish with cooking spray. Spread the bagel pieces evenly in the dish. Top with lox and sprinkle with the grated cheese, green onions, and dill weed.

2. In a medium bowl, combine the eggs, sour cream, milk and seasonings; blend well (you can use a blender, whisk, or large food processor) Pour evenly over the bagel-cheese mixture. Cover and refrigerate for at least 1 hour. (If desired, you can prepare the recipe up to this point and refrigerate for 24 hours)

3. Preheat the oven to 350 F. Bake uncovered, for about 1 hour or until the mixture is puffed and golden. Remove from the oven and let it stand for 10 minutes for easier cutting.

Join in!!! Here are the "rules" as I see it for now.

1) Choose a dish to prepare and invite 1(one) blogger to create that dish with you. You can source your recipe from a cookbook, magazine, blog or any other source. Your dish can be sweet or savoury; easy or complicated.

2) Decide upon a date that you can both mutually post your recipe within a 4 week time frame.

3) Link back to More Than Burnt Toast http://goodfoodcorner.blogspot.com/ somewhere in your post as the caretaker of this event.

4) Please feel free to use the Avatar/Badge above "Invite a Blogger to Your Table".

5) Once you have made your dish with your blogging friend or friends and posted it, you can choose to STOP or CONTINUE on and "invite another blogger to your table" to make something DIFFERENT on a mutually agreeable date within the next 4 week time frame.

6) If you would like to please e-mail Val at bloggerstable(AT)gmail(DOT)com for no other reason than to let her know you have participated. She would love to see what you have accomplished.

7) Cut and paste these instructions into your post and contact a friend. Let magic happen and let's get cooking!!!
You are reading this post on More Than Burnt Toast at http://goodfoodcorner.blogspot.com. Excerpts and links may be used, provided that full and clear credit is given to the author and or owner of More Than Burnt Toast. All rights reserved by Valerie Harrison.

Red, White and Blue Fruit Scones

Cook's Illustrated Fruit Scones

A safe and happy 4th of July to all my friends from the States!!!

 In celebration I started my day with these patriotic red, white and blue scones based on a recipe from Cooks Illustrated. I have baked them twice in the past few weeks which is something that never happens here at MTBT. That speaks volumes about how much I enjoyed them. I rediscovered them on Monica's site Lick The Bowl Good last week.

You know how it is when you have recipes bookmarked for months, perhaps years and they have yet to grace your kitchen. Well this is one of those recipes I've had kicking around. I was reminded of them on a post over at Vanilla Sugar.... who made them with raspberries. I am so glad I decided to finally whip up a batch twice and still counting. They just might be the best scones I have discovered yet with a "new to me" technique. The dough is mixed with a light touch and then folded as if you were making a rough puff pastry.

Monica added white chocolate chips. You could also use a myriad of fruits such as blackberries, nectarines, cherries or even dried fruits. This recipe is open to all interpretations. Take a peak at Monica's site for pictorial instructions since I am just not that kind of a girl. Now I am headed to the beach! I have always been a beach kind of a gal:D


**Fruit Scones**
based on a recipe from Cook's Illustrated

 Just a note before you start: It is important to work the dough as little as possible—work quickly and knead and fold the dough only the number of times called for. The butter should be frozen solid before grating. In hot or humid environments, chill the flour mixture and work bowls before use. While the recipe calls for 2 whole sticks of butter, only 10 tablespoons are actually used (see step 1). If fresh berries are unavailable, an equal amount of frozen berries (do not defrost) can be substituted. An equal amount of raspberries, blackberries, or strawberries can be used in place of the blueberries. Cut larger berries into 1/4- to 1/2-inch pieces before incorporating.
  • 16 tablespoons (2 sticks) unsalted butter, frozen whole (see note above)
  • 1 1/2 cups (7 1/2 ounces) fresh blueberries, and strawberries or raspberries(see note above)
  • 1/2 cup whole milk
  • 1/2 cup sour cream
  • 2 cups (10 ounces) unbleached all-purpose flour, plus additional for work surface
  • 1/2 cup (3 1/2 ounces) granulated sugar, plus extra for sprinkling
  • 2 teaspoons baking powder
  • 1/4 teaspoon baking soda
  • 1/2 teaspoon table salt
  • 1 teaspoon grated lemon zest

1. Adjust an oven rack to middle position and heat oven to 425 degrees. Line a baking sheet with parchment paper.

2. Score and remove half of the wrapper from each stick of frozen butter. Grate the unwrapped ends on large holes of box grater (you should grate total of 8 tablespoons). Place grated butter in freezer until needed. Melt 2 tablespoons of remaining ungrated butter and set aside. Save remaining 6 tablespoons butter for another use. Place blueberries and white chocolate chips in freezer until needed.Whisk together milk and sour cream in medium bowl; refrigerate until needed.

3. Whisk the flour, 1/2 cup sugar, baking powder, baking soda, salt, and lemon zest in medium bowl. Add frozen grated butter to flour mixture and toss with fingers until thoroughly coated. Fold in the chilled milk mixture with a spatula until just combined (do not over mix).

4. Turn the dough and any floury bits onto a well floured work surface. Lightly flour your hands and the dough and knead the dough gently 6-8 times until it just holds together in a ragged ball, adding additional flour as needed to prevent sticking.

5. Roll dough into approximate 12-inch square. Then fold dough into thirds like a business letter, using bench scraper or metal spatula to release dough if it sticks to counter top. Lift short ends of dough and fold into thirds again to form approximate 4-inch square. Transfer dough to plate lightly dusted with flour and chill in freezer 5 minutes.

6. Transfer dough to floured work surface and roll again into a 12-inch square. Sprinkle blueberries and white chocolate chips evenly over surface of dough, then press down so they are slightly embedded in dough. Using bench scraper or thin metal spatula, loosen dough from work surface. Roll up dough, pressing to form tight log, and pinch the seam closed. Lay seam-side down and press log into 12 by 4-inch rectangle. Using sharp, floured knife, cut rectangle crosswise into 4 equal rectangles. Cut each rectangle diagonally to form 2 triangles.

7. Transfer the scones to parchment-lined baking sheet. Brush tops with melted butter and sprinkle lightly with sugar. Bake until tops and bottoms are golden brown, 18 to 25 minutes, rotating the pan halfway through baking. Transfer to wire rack and let cool 10 minutes before serving.

*Refrigerate or freeze leftover scones, wrapped in foil, in an airtight container. To serve, remove foil and place scones on a baking sheet in a 375-degree oven. Heat until warmed through and recrisped, 8 to 10 minutes if refrigerated, 16 to 20 minutes if frozen.

To Make Ahead: After placing the scones on the baking sheet, either refrigerate them overnight or freeze. When ready to bake, for refrigerated scones, heat oven to 425 degrees and follow directions in step 7. For frozen scones, heat oven to 375 degrees, follow directions in step 7, and extend cooking time to 25 to 30 minutes.

You are reading this post on More Than Burnt Toast at http://goodfoodcorner.blogspot.com. Excerpts and links may be used, provided that full and clear credit is given to the author and or owner of More Than Burnt Toast. All rights reserved by Valerie Harrison.

Fanny Farmer's Raised Waffles with Strawberries

Fanny Farmer's Raised Waffles

Thank you for joining me once again as I travel along with Mary of One Perfect Bite on a culinary journey.  Gourmet Live brought out a list of the 50 most influential women in food...Fifty women game changers. Some are chefs, some are food writers, and some are women who are passionate about the creative process. You could certainly add or detract women from this list, but no matter what these women have all influenced us in one way or another. Being a woman and passionate about food myself I wanted to explore and not only learn from the masters but recreate some of their dishes to better understand what has shaped and molded them into who they are today.Follow us on this journey while we take an in depth exploration of these women's lives and what makes them who they are.

One of my favourite well-travelled bloggers Mary of One Perfect Bite invited bloggers to travel along on a culinary journey throughout the year. For 50 weeks we will experiment with dishes from each of the 50 influential women on "the list". Whether you agree or disagree with the authors chosen fifty it will be an enjoyable and creative outlet to cook from the masters. My cohorts for this adventure are Joanne of Eats Well with Others , Claudia of A Seasonal Cook in Turkey, Taryn of Have Kitchen, Will Feed,  Susan of the Spice Garden. ands Heather of Girlichef. If you would like to join in  please contact Mary. This is an informal event and you have the flexibility to follow along when you can. She will be posting every Friday.


We have all heard of the Fanny Farmer cookbooks, but what do we know about Fanny Farmer the woman.  Fannie Merritt Farmer, was stricken with what they believed was polio at the age of 17. She was bedridden and paralyzed and remained an invalid well into her 20's. Her parents urged her to study cookery under Mary J. Lincoln at the Boston Cooking-School where she would become a teacher. At 31 she not only graduated but took the school by storm eventually becoming the school head and transforming American cooking techniques still in place today.

 If any of you have been lucky enough to get your hands on a cookbook from the 1800's you will know that cookbooks relied heavily upon story-like paragraph instructions asking you to use a handful of this or a pinch of that. Her emphasis on level precise measurements led her to gradually revise the schools cookbook in 1896 and thereby creating more dependable recipe results. She revolutionized modern cooking and left an indelible print on modern cuisine. The Fannie Farmer Cookbook is a perennial favorite of chefs and home cooks alike. It’s very likely that your own mother has one tucked away in her pantry and I’m betting that some of her favorite recipes originated from within its pages.

So from her extensive collections what would I choose to make?  After browsing many comforting recipes from the pages of Fanny's books I decided that making waffles with seasonal strawberries was the way to go. One thing you may not know about me is that I do not own a waffle maker. I think this is another hint if anyone is listening!!! I called one of my good friends who does have a waffle maker and invited myself for brunch!!! Thanks to my adventurous friends Sheryl and Doug for being my taste testers!!! This classic recipe for waffles became the standard American version since the Fannie Farmer cookbook was first published. Simple and wonderful, and always a family treat. The recipe suggests you use a standard, not Belgian Waffle maker for the best results. If you like sourdough bread you will love these!

What have we been up to.....
Mary of One Perfect Bite - Rhubarb Custard Pie
Joanne of Eats Well with Others - Vegetable Paella
Claudia of A Seasonal Cook in Turkey- Pure Cream of Tomato Soup
Taryn of Have Kitchen, Will Feed - Whole Wheat Bread
Susan of the Spice Garden - Fanny Farmers Boston Brown Bread
Heather of Girlichef - English Muffins


**Fannie Farmer's Raised Waffles**
  • 1/2 cup warm water
  • 1 package dry yeast (1/4 ounce)
  • 1/2 cup butter; cut in 8 pieces
  • 2 cups milk
  • 1 teaspoon salt
  • 1 teaspoon sugar
  • 2 cups flour
  • 2 eggs
  • 1/4 teaspoon baking soda
  • butter; for serving
  • warmed maple syrup; for serving
  • strawberries
1. Put warm water in large mixing bowl and sprinkle yeast over top. Stir once or twice and leave to dissolve, about 5 minutes.

2. Melt butter in small saucepan over low heat, watching carefully and tilting pan so butter melts evenly but doesn't burn. Add milk and stir until just warm, but not hot.

3. Add warm butter and milk to yeast mixture, along with salt, sugar and flour. Beat with spoon, wire whisk or rotary beater until batter is smooth. Cover bowl with plastic wrap and set batter aside overnight at room temperature. Batter will bubble up and then subside.

4. Just before cooking waffles, add eggs and baking soda and beat until smooth. Batter will be very thin.

5. Spray cool waffle iron with non-stick cooking spray, or turn on iron and when warm, grease both sides with oil (new waffle irons have nonstick coatings and don't require greasing). Close lid and when waffle iron is very hot, pour about 1/2 to 3/4 Cup batter into it. Don't cover whole surface of waffle iron, as batter will expand and spread during cooking. You will learn how much batter to use by doing first waffle.

6. Close lid and cook. After 3 to 4 minutes, check to see whether waffle is done. When waffle iron has stopped emitting steam, lift top of waffle iron carefully -- you don't want to tear waffle. Waffle should appear golden brown. If still pale, close top and bake 1 to 2 minutes.

7. When first waffle is done, lift lid of waffle iron and gently pry out waffle with fork. Serve hot with butter and pitcher of warm syrup. While first round of waffles are being eaten, make second batch. If you don't use all of batter, store in refrigerator, tightly covered, up to several days.

Serves 6

You are reading this post on More Than Burnt Toast at http://goodfoodcorner.blogspot.com. Excerpts and links may be used, provided that full and clear credit is given to the author and or owner of More Than Burnt Toast. All rights reserved by Valerie Harrison.

Lemon Ricotta Souffle Pancake with Marionberries

Lemon Ricotta Souffle Pancake with Marionberries

When I saw this recipe from Laura Davis, a talented contributor of the Honest Cooking Network that I am a part of, I knew it would show up in my kitchen soon. I always seem to have leftover ricotta cheese so looking for ways to use it is a monthly quest. Having a special treat on the weekend for brunch is a way to treat yourself for being a control freak in the calorie department all week.

Ricotta is traditionally made from the whey left over from cheesemaking, ideally from the whey of buffalo mozzarella or sheep's milk. But if you're like me you have no access to cheesemaking by products. But delicious fresh ricotta can also be made by using readily available cow's milk, or as I did a blend of cows milk, buttermilk and cream. (The recipe will be forthcoming in a subsequent post). You will be surprised at how easy it is!!!!

To make my breakfast treat even more special I found some frozen Marionberries from Oregon at our local market. Marionberries are a bright, glossy blackberry with medium to large fruit, somewhat longer than wide, named after the Marion Valley where they were developed. It's here that they thrive and supply 90% of our crop. There are only a handful of areas in the world where these caneberries thrive and Oregon's Willamette Valley, known as the Caneberry Capitol of the World, offers the most favourable of all climates. The Valley's moist spring rains, and summers that are warm in the daytime and cool at night, provide just the right conditions to produce berries that are sweet and plump. The berry's taste is distinctively sweet, yet has a mildly tart and lasting flavor. It has a serious following among berry aficionados and highly prized by chefs and home cooks alike.

Weekends are for pancakes!!!!!So grab a cup of coffee, the Sunday newspaper, put your feet up and enjoy!

 **Lemon Ricotta Souffle Pancake with Berries**

  • 3/4 cup (75 g) of all purpose flour
  • 1/3 cup (63 g) of sugar
  • 1/2 teaspoon salt
  • 4 eggs separated
  • 4 tablespoons of unsalted butter (2 melted and 2 for the pan)
  • 2/3 cup (165 g) of ricotta, whole or part skim
  • 1/4 cup (60 ml) of lemon juice
  • zest of a lemon
  • 1/2 teaspoon of vanilla
  • 1/4 cup (42 g) of fresh or frozen berries ( I used Marionberries)
  • Turbinado or raw sugar for sprinkling over the top
  • Confectioners sugar for a light dusting
  • A light maple syrup or Lyle’s golden syrup
1. Preheat the oven to 375 degrees and preheat a 10-inch iron skillet or saute pan.

2. Mix flour, sugar and salt in a bowl.

3. Mix eggs yolks, drained ricotta, butter, lemon juice, zest vanilla in a large bowl and mix well.

4. Place the separated egg whites in a mixing bowl and whisk to stiff peaks.

5. Add the flour mixture to the wet mixture and combine well. Add a small dollop of the egg whites and mix in to lighten the batter. Add the remaining egg whites and fold in with a spatula until combined.

6. Remove the pan from the oven and put 2 tablespoons of butter it it. When the butter has melted add batter, sprinkle a few berries across the top and sprinkle on about a tablespoon or 2 of turbinado sugar. Return the pan to the oven. Bake for 20 to 25 minutes. When the pancake is puffed and lightly browned on top it is ready.

7. Serve with a light sprinkling of confectioners sugar and serve with syrup of choice.
Serves 4 - 6

You are reading this post on More Than Burnt Toast at http://goodfoodcorner.blogspot.com. Excerpts and links may be used, provided that full and clear credit is given to the author and or owner of More Than Burnt Toast. All rights reserved by Valerie Harrison.

Walnut Pancakes with Maple-Glazed Apples to Celebrate Spring

Walnut Pancakes with Maple-Glazed Apples
There are two things that I miss about living in Southern Ontario...the kaleidoscope of autumn leaves on a Sunday drive or gentle hike through the countryside... and secondly the run of maple syrup in early Spring. I seem to migrate back to Ontario every 5 years to visit my family so as an ode to Ontario with its rolling hills, multitude of lakes, world class cities and multicultural diversity I decided to relish in the rebirth of Spring and have pancakes for breakfast with roasted walnuts, maple syrup infused apples and drizzled with even more delicious warm maple syrup. Spring is an off and on again type of season just like this recipe that I made for breakfast weeks ago

Fluffy, nutty, and perfumed with allspice, these pancakes are topped with thinly sliced apples cooked lightly in Ontario maple syrup. Serve these beauties with warm syrup to drizzle on the side. I found the recipe in a friends copy of Stonewall Kitchen. What a delicious way to celebrate the beginning of a new season as well as use up the rest of the buttermilk. The recipe makes 8 delicious, nutty pancakes but if you are expecting company it is easily doubled or even tripled. I made this recipe and used up the last of the buttermilk and the last of the maple syrup.


There are few smells as sweet as the aromas coming from a rustic, wood-planked sugarhouse, with the one possible exception being these Walnut Pancakes with Maple-Glazed Apples I served. Maple syrup is a product unlike any other because its flavour and colour varies throughout the season. At the beginning of the season, the syrup is generally clear and the taste slightly sweet (Extra Light, Light or Medium). As the season progresses, the syrup becomes darker and more caramelized (Amber or Dark).

I hesitated to post this without adequate photos. I obviously need more practice in taking "action" shots with food since the pancakes are out of focus. But hey, the plate is in focus...wink.  So far I find it difficult to manoeuvre a camera and take an action shot while dining alone.The resulting pancakes were so good though with their caramelized apples embedded in each and every one that I still wanted to share. Therefore a new photo will come the next time I make these... and there will be a next time!!! I'll make a double batch for company so that I can concentrate on taking photos, someone else can pour the syrup and I can avoid the balancing act.

** Walnut Pancakes with Maple-Glazed Apples**
This recipe makes about 8 pancakes, but can easily be doubled to serve a crowd.
  • 1 cup all-purpose flour
  • 1 cup finely chopped toasted walnuts (*see note below)
  • 3/4 teaspoon baking powder
  • 1/4 teaspoon salt
  • 1 large egg
  • 1 cup buttermilk
  • 2 tablespoons unsalted butter, melted
  • 1 tablespoon maple syrup
  • Canola oil
 Maple-Glazed Apples 
  • 1 tablespoon unsalted butter
  • 2 apples, such as Macoun, Jonathan, Delicious, or your favorite variety, peeled (optional), cored, and cut into 1/2-inch-thick slices
  • 1/8 teaspoon ground allspice
  • Pinch ground nutmeg
  • 3 tablespoons maple syrup, plus extra for serving (optional)

 1. Lightly toast the nuts on a cookie sheet in a 350-degree oven for about 10 minutes, or until lightly browned. Remove from the oven and pulse in a food processor or blender. You don’t want the nuts to be like sawdust; they should be just finely ground. If you buy finely chopped walnuts, toast them in a 350-degree oven for 10 minutes, or until very lightly toasted.

2. In a small bowl, whisk together the flour, walnuts, baking powder, and salt and set aside. In a large bowl, whisk the egg. Whisk in the buttermilk, butter, and maple syrup. Add the flour mixture to the wet ingredients and blend until just incorporated, using a light touch. Set aside and let sit for 15 minutes. (If making ahead several hours, cover and refrigerate until ready to cook the pancakes. Bring the batter to room temperature before using.)

3. Meanwhile, prepare the apples: Melt the butter in a medium skillet set over medium heat. Add the apple slices, sprinkle with the allspice and nutmeg, and cook for one minute, gently stirring. Add the maple syrup and cook for two minutes, gently stirring, until the apples look glazed or caramelized. Remove from the heat and set aside.

4. To make the pancakes: Preheat the oven to 300 degrees F. Heat a large skillet or griddle over medium heat. Brush it lightly with the oil. When the pan is hot, add 1/4 cup pancake batter to the pan. Add another two or three pancakes, depending on the size of the skillet and making sure not to overcrowd the pan.

5. Place three or four of the apple slices on top of each pancake, gently pressing them into the batter. Cook two minutes or until bubbles begin to surface and the pancakes appear golden brown on the underside. Gently flip the pancakes and cook another two to three minutes, or until the apples are caramelized and the pancakes are golden brown.

6. Serve immediately or place on an ovenproof plate and keep warm in preheated oven. Repeat with the remaining batter and apples. Heat any remaining apples in the skillet until warm and serve on the side or spoon on top of the pancakes. Place one cup of maple syrup in a small saucepan and warm over low heat. Serve the warm syrup on the side, if desired.

Makes 8 to 9 pancakes

You are reading this post on More Than Burnt Toast at http://goodfoodcorner.blogspot.com. Excerpts and links may be used, provided that full and clear credit is given to the author and or owner of More Than Burnt Toast. All rights reserved by Valerie Harrison.

Tuscan Lemon Muffins for a Spring Pick Me Up

Tuscan Lemon Muffins

If dreary Spring weather is getting you down, lift your spirits by adding bright, zesty lemons to your every day cooking. Today I've featured this recipe from Cooking Light magazine for some aromatic muffins that include a splash of sunshine with every bite.  A name like Tuscan Lemon Muffins could not be more fitting for a Spring pick me up!

When I think of Tuscany I think of golden yellow? It always reminds me of  the movie "Under The Tuscan Sun." The movie had plenty of images of Tuscan villas bathed in golden yellow sunlight. Imagine walking amongst rolling hills lined with cypress tree soldiers, surrounded by ancient vineyards, olive and lemon trees with nothing but the sounds of  birds singing to interrupt your dreaming.

In Italy, limoni are everywhere from handpainted ceramics to lemons at the fruit stand the size of baseballs. Around here lemons are as popular and widely used as simple spices like salt and pepper. I have embraced lemon juice and zest as a cornerstone in my love for Mediterranean cuisine. A little lemon goes a long way!!! Besides being a fundamental ingredient in seafood dishes in Italy, lemon is one of the most popular sweet treat flavours as well with its place right alongside almond, hazelnut and chocolate. From the nationally celebrated beverage Limoncello to its tart, citrusy flavour featured in biscotti, cakes and gelato lemon is celebrated this season.

The brightly coloured outer layer of citrus fruit, the zest, contains scented essential oils that impart a handsome flavour to dishes. When a recipe calls for strips of zest, a vegetable peeler works very well. But for fluffy, grated zest, try using my favourite kitchen gadget a micro plane zester. Years ago I remember watching an episode of Martha Stewart where she used a woodworkers microplane to zest her lemons. I am sure this is where the idea came from to create a microplane for cooking. Best invention yet!

When juicing your citrus to extract the maximum juice, either roll your citrus fruit around on a flat work surface, pressing down firmly with the palm of your hand, or warm through gently by dropping into a pan of hot water, popping into the microwave for a few seconds, or even placing in a warm oven for a minute or two. I use the microwave method myself and there is never a drop of juice wasted.

Sit down for a leisurely breakfast with one of these zesty ricotta muffins, dream of Tuscany and let the world go by.

**Tuscan Lemon Muffins** 
Maureen Callahan, Cooking Light
  • 7 9/10 ounces all-purpose flour (1 3/4 cups)
  • 3/4 cup granulated sugar
  • 2 1/2 teaspoons baking powder
  • 1/4 teaspoon salt
  • 3/4 cup part-skim ricotta cheese
  • 1/2 cup water
  • 1/4 cup olive oil
  • 1 tablespoon grated lemon rind
  • 2 tablespoons fresh lemon juice
  • 1 large egg, lightly beaten
  • Cooking spray
  • 2 tablespoons turbinado sugar
1. Preheat oven to 375°.

2. Weigh or lightly spoon flour into dry measuring cups; level with a knife. Combine flour and next 3 ingredients (through salt); make a well in center. Combine ricotta and next 5 ingredients (through egg). Add ricotta mixture to flour mixture, stirring just until moist.

3. Place 12 muffin-cup liners in muffin cups; coat with cooking spray. Divide batter among muffin cups. Sprinkle turbinado sugar over batter. Bake at 375° for 16 minutes or until a wooden pick inserted in center comes out clean. Cool 5 minutes in pan on a wire rack.

You are reading this post on More Than Burnt Toast at http://goodfoodcorner.blogspot.com. Excerpts and links may be used, provided that full and clear credit is given to the author and or owner of More Than Burnt Toast. All rights reserved by Valerie Harrison.

Vanilla-Infused Icewine Pain Perdu

Vanilla-Infused Icewine Pain Perdu

My recipe as seen on Maple Syrup World.  where you will find an exclusive 10% Off coupon code: MORETHANBURNTTOAST, valid for 20 orders on all their products

So perhaps it is the crocuses, the slightly warmer days, the lengthening hours of light that makes April a month that dreams are made of. Why not dream of starting your day off at a sidewalk cafe in Paris and watching the day go by. In France you won't find French Toast on the menu, just order Pain Perdu.

Spring won't let me stay in this condo any longer! I must get out and breath the air deeply again. That's when I turn to quick and easy dishes like French toast to start a sun-filled relaxing Sunday off to perfection. With it's caramelized buttery exterior and a custardy interior it makes for a sinful Sunday morning treat. As we follow the natural course from winter into spring, our bodies welcome transitional recipes like this one that warm us to the core and prepare us for a fresh start now that Spring has arrived!

There are two things that I miss about living in Southern Ontario...the kaleidoscope of autumn leaves on a Sunday drive or gentle hike through the countryside... and secondly the run of maple syrup in early Spring. Growing up in Southern Ontario the one thing that was constant was our annual trip to the sugar bush. There are few smells as sweet as the aromas coming from a rustic, wood-planked sugar house, with the one possible exception being this adult-inspired French toast I sometimes prepare on Sundays.


I seem to migrate back to Ontario every 5 years to visit my family so as an ode to Ontario with its rolling hills, multitude of lakes, world class cities and multicultural diversity I decided to relish in the rebirth of Spring and have French Toast.

Start with a good baguette sliced on the bias and dipped into a mixture of egg, whole milk, Icewine and vanilla. The slices are then pan-fried in butter and drizzled with a grown-up combination of Icewine and maple syrup and finally dusted with powdered sugar. If you don't have Icewine tthere is no reason you could not use a good quality very sweet dessert wine or late harvest wine.

Now it's time to go for a hike to wear off this carb-induced coma!!!

Addendum: I had several questions asking about Ice Wine which is the valley's most celebrated offering. Eiswein or Icewine was invented in Germany in 1794. Icewine is a rare dessert wine produced in the Okanagan and Niagara Regions from the juice of naturally frozen grapes that have been picked in the middle of a cold Canadian winter. This intense, gorgeous nectar is made by leaving grapes on the vine through a frost, after which they are promptly picked and pressed. They must be picked at temperatures at least -10ºC, with the grapes frozen on the vine and hand-picked in the middle of the cold Canadian night. Once picked, the grapes are pressed immediately while still frozen. Each frozen grape creates just one drop of ice wine. One smooth, rich luxurious drop. Imagine a kaleidoscope of peaches, nectarines, apricots, and honey.  Its opulent flavours are balanced by crisp acidity.  Among the dozens of types of dessert wines in the world, my absolute favorite is Icewine.

The world's leading producer of Icewine is Canada, followed by Germany and then Austria. Because of the concentrated taste, ice wine is one of the most elegant and refined dessert wines. I often fill a Bernard Callebaut chocolate cup with Icewine and dessert is simple and delicious. Because the wine is so intense, a typical serving is just one ounce.You'll probably pay more than $50 for a tall, skinny bottle of ice wine, but just about every Okanagan winery makes its own signature variety. Optimal weather conditions can never be assured, so true ice wine is a real treat. The cold blast of winter arrived early last year so it was a stellar year for production.


**Vanilla-Infused Icewine Pain Perdu**
(Recipe from the Inniskillin Winery Icewine book, Extreme Winemaking.)

 
  • 1 egg lightly beaten
  • 2 egg whites
  • 3 tbsp Icewine
  • 1 tbsp sugar
  • 1 vanilla bean, split lengthwise
  • ½ cup whole milk
  • 1 tbsp unsalted butter
  • 8 thick slices baguette, cut on a diagonal
  • 1 cup pure maple syrup
  • ½ cup Icewine
  • Garnish icing sugar for dusting

 1. Place the egg, egg whites, Icewine, and sugar in a bowl and whisk to combine. Using the tip of a sharp knife, scrape the seeds from the vanilla bean into the egg mixture. Add milk and whisk until frothy.

 
2. Heat a large skillet over medium heat and melt butter.

 
3. Dip a few pieces of bread into the egg mixture, soaking both sides well, and place in the skillet. Cook for 2 minutes on each side or until lightly golden. Repeat with the remaining bread.

 
4. Mix maple syrup with Icewine.

 
5. Serve French toast dusted with icing sugar and drizzled with maple/Icewine mixture.

 
6. Serve with chilled Oak-aged Vidal or Sparkling Icewine.


You are reading this post on More Than Burnt Toast at http://goodfoodcorner.blogspot.com. Excerpts and links may be used, provided that full and clear credit is given to the author and or owner of More Than Burnt Toast. All rights reserved by Valerie Harrison.

Celebrate Pancake Day with Tiramisu Pancakes

Tiramisu Pancakes

Today is Shrove Tuesday which to me has always been referred to as "Pancake Day."  Perishables like eggs and dairy products, which are generally banned during Lent, need to be used up and if you practice religious holidays this is your last night to indulge in rich, fatty foods before the ritual fasting of the Lenten season. There is no better way to use up these ingredients today than in our favourite breakfast treat... pancakes!!

In Britain and several other countries around the world, Pancake Day is celebrated with fun games and of course a lot of eating. As a child I loved the fact that we could have "breakfast for dinner". We would get into our pyjamas and sit around the large wooden dining room table wolfing down as many pancakes as we could handle at such a tender age. Even if you don't follow religious holidays Pancake Day is a time to celebrate!!!! In my books ANY excuse to celebrate with food is a good thing!!

Of course Canada is not the only country celebrating this time of year. Mardi Gras is French for "Fat Tuesday" (in English tradition, Shrove Tuesday) in New Orleans, what’s known as Paczki Day (pronounced much like ‘punch-key’) in Poland, and then there is Italy with Carnavale....all celebrations whose roots began in using up perishables before the Lenten season.

We always celebrated Pancake Day when we were kids, so, in the naivety of a child I thought it was a British thing. What kid, or adult for that matter, wouldn't want to have pancakes for supper with loads of Canadian maple syrup!!!! You don't have to be British, Catholic, Polish, follow Lent or be in New Orleans or Italy to have some delicious pancakes for supper on Shrove Tuesday!!I don't let that get in my way!!!! Of course I am not partying it up as they are in New Orleans but am celebrating in my own quiet way.

 I decided to amp it up and create special pancakes especially for today. Would I go for pancakes with bacon, apple or corn? I wisely opted for these cocoa flavoured pancakes with their out of this world mascarpone cheese topping which make for a not too sweet tiramisu-inspired treat. This is the perfect way to start or end your day. The idea for these pancakes came from Ivory Hut . You would expect them to be sweet like their namesake but they are perfectly balanced in flavour and texture. So depending on where you are be sure to enjoy the festivities... Pancake Day, Shrove Tuesday, Fat Tuesday, Fastnacht Day or Fausnaught Day!!!! Amp up your breakfast or "breakfast for dinner" with these not too sweet cocoa-flavoured rendition of the traditional pancake. Food has no calories today. It's a known fact....


**Tiramisu Pancakes**

For the pancakes:

2 cups all-purpose flour
2 tablespoons sugar
2 tablespoons cocoa powder, slightly rounded, sifted
2 teaspoons baking powder
1/2 teaspoon baking soda
a generous pinch of salt
1 1/2 cups milk
1/2 cups sour cream
3 large eggs
4 tablespoons butter, melted
2 teaspoons vanilla
2 tablespoons instant coffee

For the glaze (optional):

1/4 cup maple syrup
3 tablespoons softened butter
2 tablespoons coffee liqueur

For the cream:

4 oz.(1/2 cup) mascarpone cheese
1 cup whipping cream
2 tablespoons coffee liqueur
2 tablespoons maple syrup

*******
Start by preparing the cream and the glaze. For the cream, beat all ingredients together and whip until you have soft peaks. Set aside in the refrigerator. (Tip: this cream tastes amazing, and is what really makes these pancakes. If you like generous amounts of cream on your pancakes, you might want to make a double portion.) The glaze is optional, but very, very (and I mean very) good. Simply combine the ingredients well. Set aside.

In a medium bowl, combine the flour, sugar, cocoa powder, baking powder, baking soda, and salt. Make sure the cocoa powder is well sifted, so that it will dissolve evenly.

In a separate bowl, combine the milk and sour cream until smooth (it helps to slowly dilute the sour cream with the milk while whisking, which reduces the chances of clumps). Add the instant coffee powder and mix well until dissolved. Whisk in the eggs, melted butter, and vanilla. Add the wet mixture to the dry ingredients, mixing gently until you have a slightly lumpy batter but without any large clumps of flour. If batter is a little runny, add a tablespoon or two of flour. I like to transfer my batter to a measuring cup or something else with a spout, for easier cooking.

Let the batter sit while you preheat your griddle. When griddle is hot, drop batter in portions desired (1/4 cup for regular-sized pancakes) onto the greased griddle. When bubbles come up and edges look cooked, gently flip to cook the other side. Once pancakes are cooked, transfer to a plate. Spread a small amount of the maple glaze over the top of the pancake so it soaks in while still hot. Continue with the remaining batter until done.

To serve, dollop a generous amount of the cream in between layers of pancakes. Top with more cream, and then top with shaved chocolate, or a light dusting of sifted cocoa powder.

Serve with extra cream and/or glaze on the side for dipping. A bonus: these pancakes taste amazing even when cold.

You are reading this post on More Than Burnt Toast at http://goodfoodcorner.blogspot.com. Excerpts and links may be used, provided that full and clear credit is given to the author and or owner of More Than Burnt Toast. All rights reserved by Valerie Harrison.

Fruit Salad with Cannoli Cream for Carnivale

Fruit Salad with Cannoli Cream

I was 18 the last time I visited Italy. At 18 I experienced the world differently than I would today but still the first thoughts that come to mind are the wonderful waterways and mazes of Venice, black olives, olive oil, tossing a coin in the Trevi fountain, pizza, homemade pasta... and trying my very first ‘cannoli’. It is said that you will never find two cannoli recipes that are exactly the same. Many swear that the taste and the experience of eating a cannoli, when it is well made, can never EVER be forgotten. I would have to agree wholeheartedly since I have never had one in all these years that could hold a candle to the ones I had on the Italian Riviera or the streets of Rome!

Cannoli originated in Palermo and the surrounding areas and were originally made for Carnival, which is a festival that occurs before Lent and is one last fling before the fasting begins. The traditional filling is a sweetened ricotta cheese filling sometimes mixed with candied orange zest or citron, chopped pistachios, grated chocolate, or drizzled with a variety of extracts or flavourings such as fortified wine and liqueurs. 

This fruit salad with with it's ricotta cream topping is a healthy reminder of Italy and Carnivale!!! I made both the fruit salad and the cannoli cream the night before to enjoy a leisurely Sunday morning with a cup of tea and a good book. The sun is shining so it looks like a good day for a walk!!!


**Fruit Salad with Cannoli Cream**
adapted from Giada De Laurentis

1/3 cup whole milk ricotta
2 tablespoons plus 1/3 cup whipping cream
3 tablespoons icing sugar
dash of ground cinnamon
12 oz fresh strawberries hulled, quartered (about 2 1/2 cups)
1 1/4 cups fresh blueberries
1 cup seedless grapes
1 cup diced fresh pineapple
1 tablespoon sugar
1 tablespoon fresh lemon juice
2 - 3 tablespoons sliced almonds or chopped pistachios

**********************
Stir the ricotta and 2 tablespoons of cream in a medium bowl to blend. Using an electric mixer, beat the remaining 1/3 cup of cream, powdered sugar, and cinnamon in a large bowl until semi-firm peaks form. Fold the ricotta into the whipped cream. Place in the refrigerator for at least 30 minutes to stiffen and yield a creamier filling. (Can be prepared 4 hours ahead. Cover and refrigerate.)

Toss the fruit, sugar, and lemon juice in a medium bowl to combine. Let stand until juices form, tossing occasionally, about 15 minutes. Add the kiwi.

Spoon the fruit mixture into 4 dessert bowls. Dollop the ricotta cream atop the fruit. Sprinkle with the almonds or chopped pistachios and serve.

Serves 4

You are reading this post on More Than Burnt Toast at http://goodfoodcorner.blogspot.com. Content must be credited to this author.

Easy Smoky Potato Pancakes...and the Winner of My 4 Year Blogiversary Giveaway


Smoky Potato Pancakes

Yesterday we had such high hopes that Spring had arrived. People were walking the pathway behind my condo, winter jackets were shed...and now back to reality this morning with a blanket of snow covering the ground. Sigh....all the more reason to take comfort in the kitchen.

Although I consume a majority of vegetarian meals it has been a while since I posted a recipe for Meatless Mondays. From Canada to Croatia, nations across the globe are taking the pledge and joining the Meatless Monday movement. Going meat free one day each week is a powerful way for each of us to reduce our ecological footprint and reconnect with foods that are both nutritious and delicious.

This is not a vegetarian meal unless you eliminate the smoked bacon which is simple to do since it is just sprinkled on top. This is an incredibly easy recipe from Cooking Light magazine that is very pocketbook friendly. My obsession with potatoes is legendary here at the More Than Burnt Toast household so this makes a perfect light lunch in my books.

For my 4 year blogiversary giveaway I opened it up to all bloggers worldwide. Now wouldn't you know it the winner chosen randomly lives right here in Canada! A big hug and congratulations to Brenda of Brenda's Canadian Kitchen. I hope you enjoy Anne Lindsay's book Lighhearted at Home: The Very Best of Anne Lindsay.

A portion of the proceeds from the sale of this book go to support the work of the Heart and Stroke Foundation. The Heart and Stroke Foundation, a volunteer-based health charity, leads in eliminating heart disease and stroke and reducing their impact through the advancement of research and its application, the promotion of healthy living, and advocacy. You can also visit their website at heartandstroke.ca.

**Smoky Potato Pancakes**
adapted from Cooking Light

2 center-cut hickory-smoked bacon slices
2 cups chopped onion
1 cup thinly sliced leek
3 garlic cloves, chopped
1 1/2 pounds shredded peeled baking potato (about 2 large)
1/3 cup (1 1/2 ounces) shredded sharp cheddar cheese
3/4 teaspoon salt
1/2 teaspoon freshly ground black pepper
2 large eggs
Cooking spray
1/4 cup reduced-fat sour cream

*******************
Preheat oven to 425°.

 Cook bacon in a large skillet over medium heat until crisp. Remove bacon from pan using a slotted spoon, and crumble. Add onion to drippings in pan, and cook for 5 minutes, stirring occasionally. Add leek and garlic; cook for 2 minutes, stirring frequently. Combine onion mixture, grated potato, cheddar cheese, 3/4 teaspoon salt, black pepper, and 2 large eggs in a medium bowl, stirring well.

Divide the potato mixture into 8 equal portions, and shape each portion into a 1/2-inch-thick patty. Place patties on a baking sheet coated with cooking spray. Coat patties lightly with cooking spray. Bake at 425° for 25 minutes or until golden and set. Top with crumbled bacon and sour cream.

You are reading this post on More Than Burnt Toast at http://goodfoodcorner.blogspot.com. Content must be credited to this author.

Frogs Hollow Granola Maple Baked Apples


L'il Burnt Toast and The Kid are visiting for the weekend. Talk about the perfect way to start the new year for this mom!!New Years Day we indulged in a hearty breakfast that included Maple Glazed Peameal Bacon with Latkes, strip bacon, English Muffin Loaves...in short a "not so healthy" way to begin a new year resolution of eating health conscious choices, but, still the perfect way to bring in a year of promise. These are not the "Breakfasts of Champions" but are certainly acceptable for hearty weekend fare.

In saying that, today is the day I am turning over a new leaf and present to you a healthier alternative for breakfast that is equally delicious and filling. I used  the Frogs Hollow granola I received at Foodbuzz this year. I can't believe I still have some leftover it is that good!I don't expect to be back in California before the fall so with a little Google search you will find the recipe below from Epicurious for Frogs Hollow Granola so that we can all enjoy our own.

If I made New years resolutions I have decided to start making my own granola. I hope my friends don’t buy me a tie-dye leotard to match my Birkenstocks...but it’s really because I love granola on my Greek yogurt with some bananas or other fruit for breakfast. It is also perfect for these baked apples as well. Such a tasty way to turn over a new page.

P.S. The kids gave me a light box for Christmas so I will be experimenting.

**Maple Granola Baked Apples**

4 apples
1/3 cup whole grain granola
3 tablespoons chopped cashews, walnuts or sunflower seeds
3 tablespoons raisins or dried cranberries
2 tablespoons butter or margarine, melted
2/3 cup apple juice
1/4 cup maple syrup

***************
Core apples; peel 3/4-inch (2 cm) wide strip from around top of each. Trim base if necessary to level. Place in 8-inch (2 L) square glass baking dish.

Combine granola, cashews or seeds, raisins and butter; stuff into apple cavities. Whisk apple juice with maple syrup; pour over apples. Bake in 375°F (190°C) oven, basting every 10 minutes, for about 15 - 20 minutes or until very tender and flesh is easily pierced with knife. Let cool until warm. To serve, spoon yogurt over apples. (Make-ahead: Cover and refrigerate for up to 1 day; reheat in oven for 20 minutes.)

**Frogs Hollow Farm Granola**

This basic but addictive granola comes from chef Becky Courchesne at Frog Hollow Farm in San Francisco's Ferry Building. She measures ingredients by weight, so if you have a kitchen scale use it for this recipe. They've included approximate cup measurements if you don't have a scale. Her recipe is simple and understated, lightly sweetened with honey. Courchesne uses a little bit of milk powder, which helps bind the clumps together, and adds calcium and protein. Dry ingredients are limited to raisins, sliced almonds and sesame seeds in addition to the oats.

1 pound rolled oats (about 4 1/2 cups)
4 1/2 ounces sliced almonds (about 1 1/4 cups)
2 ounces sesame seeds (scant 1/2 cup)
2 ounces wheat germ (about 2/3 cup)
3 ounces nonfat dried milk (scant 2/3 cup; see Note)
5 1/2 ounces whole-wheat pastry flour (about 11/3 cups)
4 ounces sunflower seeds (about 2/3 cup)
1/2 teaspoon kosher salt
18 ounces honey
7 1/2 ounces safflower or canola oil
4 to 5 ounces raisins or dried fruit of choice (about 1 cup)

***********
Preheat the oven to 325 degrees if conventional, or 300 degrees if convection.

In a large bowl, combine the oats, almonds, sesame seeds, wheat germ, dried milk, pastry flour, sunflower seeds and salt.

In a large sauce pan over low heat, warm the honey and oil together. Do not overheat, or the granola will have a burned taste. Pour the honey mixture over the dry ingredients and mix well.

Divide the granola between 2 half sheet pans or rimmed baking sheets. Bake for 10 minutes, remove from oven, toss granola, spread out again and bake 10 minutes more.

Remove from oven a second time, toss and spread out, breaking up any big chunks. Bake for 10 minutes more. The granola should feel dry but not too dark.

Remove from the oven and cool completely; if after cooling, the granola feels soft, you can bake again until it feels dry. (Do not bake again after you've added the dried fruit.)

Once granola is completely cool, add the raisins or dried fruit. Store in an airtight container in a cool, dry place for up to four weeks.

Makes 15 cups

Note: Nonfat dried milk can be found in the bulk bins or baking aisle of most grocery stores.

You are reading this post on More Than Burnt Toast at http://goodfoodcorner.blogspot.com. Content must be credited to this author.

Dutch Baby with Blackberries and Blackberry Honey

Dutch Baby with Blackberries and Blackberry Honey

Welcome to my Sunday mornings. For me it is the only day where I can lie in bed for as long as I wish, have a leisurely breakfast and treat myself or my guests royally. Why not serve up this classic Dutch Baby with fresh from the farmers market picked blackberries, some slices of Canadian bacon and a steamy cup of coffee.

Known as the "Cabernet" of berries for their earthy wine-like taste blackberries are a favourite here on the west coast. They grow wild prolifically on every roadside and for those brave enough and armed with long sleeved shirts and pants you will be able to keep your neighbourhood supplied with delicious, plump berries throughout the season. Sadly I live in the interior in a desert oasis so rely upon these brave souls to truck them into our farmers markets. They come at a premium price but are so worth it!!!

Blackberries are similar to raspberries with some of the same nutritional values and health benefits including antioxidants, vitamin C, and fiber. The blackberry family, a member of the rose family, are "aggregate fruits" that are composed of many individual fruits called drupelets. Blackberries can also be called "bramble berry" or "bramble raspberry" and have numerous (and very sharp) short curved spines.

Bramble is the common name for the plant on which the blackberry fruit grows, not the name of the fruit itself and takes me back to my childhood with one of my favourite series The Brambly Hedge by Jill Barklem. I loved exploring the miniature world of the hedgerow and meeting the families of mice that live there through this series of books almost as much as I loved to visit Narnia with C.S. Lewis. The mice had such adventures including a midsummer mouse wedding, a wonderful surprise birthday picnic party, a scary mountain exploration, and the biggest celebration of all – the Ice Palace Ball!

Blackberries have risen in culinary prowess here in the West with the fame of the Marionberry, a species of blackberry cultivated south of here in Oregon's Willamette Valley (Marion County). They have exceptional aroma and taste which makes them highly prized by chefs and home cooks alike.

I have also recently discovered that blackberries are for women only. Sorry you guys out there, if indeed any men read this blog, when your significant other makes a delicious no-bake cheesecake topped with blackberries you will need to back away. I am of course only kidding because I don't want to eat this delicious German-inspired pancake in today's post all by myself! I recently read that blackberries have recently been recognized as a leading source of compounds thought to produce health benefits for women, due to their high concentrations of phytoestrogens. Phytoestrogens, literally “plant estrogens”, have been of interest to the scientific community because of their possible role in prevention of both breast and cervical cancer. These compounds act as a natural form of estrogen. Studies indicate that blackberries may contain some of the highest levels of phytoestrogens. So eat those blackberries ladies whether you find them frozen, in jam or au naturel.

The perfect foile for my blackberries was to make a comforting breakfast treat... a Dutch Baby, sometimes called a German pancake  It is a sweet breakfast dish similar to Yorkshire pudding and derived from the German Apfelpfannkuchen. This dish won me over years ago not only because of its great name, but also because it puffs up to great heights while cooking. What a presentation it makes!!!!This pancake is not as sweet as other pancakes so is traditionally served with lemon juice and icing (powdered) sugar. That is nice but I wanted to use those delicious blackberries discovered at the farmers market over the weekend. I had some blackberry honey which I drizzled on top as well.

**Dutch Baby with Blackberries and Blackberry Honey**
Makes 2 to 4 servings:

3 eggs, room temperature
1/2 cup milk, room temperature
1/2 cup sifted bread flour or all-purpose flour*
1/8 teaspoon pure vanilla extract
1/8 teaspoon ground cinnamon
7 teaspoons butter
Freshly-squeezed lemon juice
Powdered (confectioners') sugar
1 container blackberries
Honey for drizzling

*Bread flour is a high-protein flour. The high protein helps the pancake rise. All-purpose flour may be substituted but the results won't be as spectacular.

***********************
Preheat oven to 450 degrees F. NOTE: It is very important that you preheat your oven. Place oven rack on the middle rack of your oven. Place a large, heavy ovenproof frying pan or a cast-iron skillet (I like to use my 10-inch cast-iron skillet), in the oven until hot and sizzling. While pan is heating, prepare your batter.

NOTE: Use a shallow pan, not more than 3 inches deep (pie pans, cast-iron skillets, oven-proof fry pans, baking dishes, paella pans). Like I said before, I prefer using a cast-iron skillet or pan because it acts as a heat reservoir, retaining the heat and distributing it evenly.

In a large bowl, beat the eggs with a blender until light and frothy; add milk, flour, vanilla extract, and cinnamon; beat for 5 minutes more. The batter will be thin, but very smooth and creamy.

Using a pot holder, remove the hot skillet from the oven; add the butter; tilting the pan to melt the butter and coat the skillet.

Pour the prepared batter into the hot skillet, all at once, and immediately return the skillet to the oven.

Bake approximately 20 to 25 minutes or until puffed and golden brown (bake until the pancake puffs up around the edges - it may puff irregularly in the center).

Remove from oven and serve immediately. Either bring the pancake to the table in its pan or slide it onto a serving plate. Once out of the oven, the pancake will begin to deflate.

 To serve, cut into serving-size wedges and transfer to individual serving plates. Top with blackberries, drizzle with warm honey and serve immediately. Or for a a classic German Pancake/Dutch Baby, sprinkle with freshly squeezed lemon juice, and dust the top with powdered sugar.

Topping Ideas:

Sifted powdered (confectioners) sugar
Fresh applesauce with a dash of cinnamon
Whipped cream and sliced fresh strawberries
Syrups (maple, your favorite fruit syrup, or honey)

NOTE: If you have different sizes of pans adjust your batter accordingly.
Pan Size      Butter      Eggs      Milk and Flour

2-3 qt.         ¼ cup        3          ¾ cup each
3-4 qt.         1/3 cup      4          1 cup each
4-4½ qt       ½ cup        5          1¼ cups each
4½-5 qt       ½ cup        6          1½ cups each

You are reading this post on More Than Burnt Toast at http://goodfoodcorner.blogspot.com. Content must be credited to this author.