Showing posts with label cake. Show all posts

Pineapple-Coconut Watergate Cake

I have no idea why someone named this tropical tasting, cool and creamy dessert such a politically loaded name as  "Watergate", but no matter....the only scandal that you'll have to worry about when you make this cake is who gets the last piece! 

Click here for printable recipe. 

The ingredients:***(note:  instead of Cool Whip, I used 1 cup of whipped whipping cream combined with about 1/3 cup sugar)

1 yellow cake mix, prepared and baked as directed on box
1 pkg. (8-ounces) cream cheese, at room temperature
3 cups milk, divided
2 pkg. (3-ounces each) instant pudding (I used vanilla, but it's more traditional to use pistachio pudding)
1 container (8-ounces) Cool Whip, thawed
1 can (20-ounces) crushed pineapple, drained
1 cup coconut, toasted** (see note below)

Directions:  Bake cake as directed on package.  Set aside and allow to cool completely.  Beat cream cheese and 1/2 cup milk in large bowl until smooth.  Add pudding mixes and remaining 2-1/2 cups milk.  Whip until smooth.  Fold in Cool Whip.  Pour over cooled cake and smooth out.  Top with drained crushed pineapple and toasted coconut.  Refrigerate 2-3 hours or until topping is set.  Serve cold.  Enjoy! 

**NOTE:  You can toast the coconut in a dry skillet over medium heat for around 5 minutes, or until lightly browned  or darker if you like. 

Don't miss a single recipe....sign up for free email updates.


***

Cooking with Kids: Ladybug Cupcakes

Recently my little girl turned six and was excited to bring in a fun birthday treat to share with her classmates at school.  Since her birthday fell on one of my craziest days of the week, in addition to making them cute and fun, I also needed them to be simple and easy to make.   That's when I thought of these cute little cupcake fellows I had seen at a friend's house! The process of decorating them, except the antennae, was simple enough to be a kids' job.     The antennae were definitely an adult job, and a little challenging even for me  at first, but once I got the system figured out (using a straight sewing pin) it went pretty fast.  These would be a perfect treat for a springtime birthday party or for a preschool bug theme.  Enjoy!   

While you're here, be sure to check out my other fun cooking with kids ideas. 


Click here for printable recipe. 


The ingredients:

Baked cupcakes
Red (or pink) frosting
Brown m&m's (five per cupcake)
Brown shoestring "pull n peel" licorice (I could only find red)
Gumdrops

Directions:
Frost the cupcakes with red or dark pink frosting. 

Place 5 brown m&m's over the cupcake (leaving room for the gumdrop head).


Peel licorice into single strands and cut into approximately 1-inch pieces. 
Using the point of a sharp knife (or a sterilized sewing pin), poke two small holes in the top of the gumdrop for the antennae. 

Again, using the point of the knife or pin poke the antennae into the holes, taking care not to break the licorice.  (it took me a few tries to get it right, but after I got the hang of it, it was much easier).
Place the gumdrop and antennae onto the cupcake. 

Smile and enjoy!!!


************************
Don't miss a single recipe, sign up on the right to be an email subscriber! 

Allergy Friendly Chocolate Cake: with Paw Print Decorations (perfect for Cub Scouts or Animal Themed Party)

With my son’s recent eighth birthday, we’ve recently re-entered the world of Cub Scouts again after a 4+ year hiatus since my older son graduated up to Boy Scouts.  The Pinewood Derby, Blue and Gold Banquet, and den and pack meetings have become a regular part of our busy calendar.  As part of this new world, we’ve had the opportunity to bring treats a few times.  I was searching for something easy and cute, when I stumbled across this idea on the Family Fun website….Paw Print Cupcakes.  They were easy enough for my son to completely make himself and they were cute and fitting with the Cub Scout theme….perfect! 

As he has a fellow den member with an allergy to dairy, I was further challenged to find a way to make the treats allergy friendly as well.  We’ve been making this Wacky Cake recipe, which is completely egg and milk free, for years for another friend with allergies.  It’s easy to make, doesn’t fall apart,  and actually tastes good too, which is more than can be said for most egg free cake recipes I’d tried previously.  So we combined the Wacky Cake with some store bought Pillsbury Cream Cheese frosting, which ironically, considering its name, doesn’t contain any dairy at all,  and some Oreo cookies, which are also totally dairy free.  While the Junior Mints are dairy free as well, they are processed in a plant with other dairy products, so you may need to substitute those for mini-Oreos if you are making these for someone who is deathly allergic to dairy products (it’s fairly uncommon to have that severe an allergy to dairy, but you should check first to make sure). 

In any case, allergies are not, these cupcakes are fun and perfect for kid-project on a rainy day!  They’d also be perfect for a dog or bear themed birthday party or for a classroom activity.   Smile

Enjoy!


Click here for printable recipe.

The ingredients:

“Wacky Cake”:  Dairy Free Chocolate Cake (No eggs, no milk)
1-1/2 cups all-purpose flour
1 cup sugar
3 Tbs. unsweetened cocoa
1 tsp. baking soda
1/2 tsp. salt
1 tsp. vanilla
1 tsp. vinegar
5 Tbs. vegetable oil
1 cup cold water

Directions:  In a large mixing bowl, mix flour, sugar, cocoa, soda and salt. Make three wells in the flour mixture. In one put vanilla; in another the vinegar, and in the third the oil. Pour the cold water over the mixture and stir until moistened.

Pour into 8 x 8-inch pan or prepared cupcake tins. Bake at 350°F. oven for 25 to 30 minutes, or until it springs back when touched lightly.  Makes 1 (8x8-inch) cake or 12 cupcakes.  Enjoy! 


Paw Print Decorations: 


Baked cupcakes
Dairy Free white frosting  (see note below)
Oreo cookies  (Oreos are totally dairy free)
Junior Mints candies  (these are processed in a plant with other dairy products, but do not contain dairy themselves.  If someone is severely allergic and cannot even eat product processed in a plant with dairy products, then I recommend mini Oreos instead (found with the snack foods))

**NOTE:  I still haven't found a dairy free icing recipe that I totally love, so I usually just buy store bought frosting when I'm cooking for someone with allergies.  Many varieties of Pillsbury frostings do not contain any dairy, including vanilla, buttercream, and cream cheese (Yes, I find it  ironic and somewhat humorous that they have the word "cream" in the title and do not contain any milk products at all).


Directions:
Frost cupcakes with white frosting.  Top each cupcake with one Oreo and three Junior Mints to resemble a paw print. 


(I’m totally in love with my Cupcake Courier !  My mom got it for me for Christmas and I highly recommend it for anyone who regularly brings cupcakes to activities!) 


Enjoy! 

Cooking with Kids: Snowman Cupcakes

In the eleven years we’ve lived in the DC area, we’ve experienced all sorts of wild weather—from tornado warnings, to behemoth snowstorms, to record breaking heat.  Yesterday’s weather took the cake though for weirdness though.  Over the course of 24 hours, we got snow, then rain, then sleet, then hail, then “thunder snow” (so the news called it), and then 8-inches of wet, heavy snow.   My friends’ Facebook statuses are littered with tales of 11+ hour commutes home last night and widespread power outages.  Thankfully, we live very near the Metro, so my husband’s commute wasn’t too horrible, and while our electricity did flicker several times, it never went out completely.  
But now, I’m left snowed in with five kids home from school yesterday, today, probably tomorrow.  We needed something fun and sweet to entertain us…like these cute little snowmen cupcakes.  With a little inspiration from an old Family Fun magazine,  some long-lost cupcakes we found in the freezer, and some leftover goodies from another project a few weeks ago—these cute fellows were born.  Fun for the kids, sweet to eat, and a snowman without the freezing toes!     

For more fun snowy day food projects see my Snowman Cookies and my  Groundhog's Day cupcakes. 
Click here for printable recipe. 


The ingredients: 
Baked cupcake
White frosting
2-3 large marshmallows
2 stick pretzels
1 Oreo cookies, “lid” separated from the cream filling
1 Junior Mint
1 orange gumdrop or candied orange slice
Fruit roll-up, cut into a narrow 7-8-inch long strip
Black decorating gel

Directions:  Frost the cupcake with white frosting.  Pressing down firmly with your hands, flatten 1-2 large marshmallows (depending on how high you want your snowman).  Gently spear the flattened marshmallows with a stick pretzel, leaving a small stem at the bottom to anchor into the cupcake.

  Add a whole, non-flattened marshmallow to the top for the head—pushing and squishing until it is stable and looks the way you want it to.  Using the small stem at the bottom of the pretzel, anchor it into the cupcake. 

Now for the fun part….decorating the snowman!  First break a stick pretzel in half and gently spear into the sides of the snowman, to be the arms.  Make sure they are placed low enough to accommodate the scarf and the face. 

Next, take the “lid” off of an Oreo cookie and spread a small amount of frosting onto the bottom.  Place on the snowman’s head to be the hat.  Dab a small amount of frosting onto a Junior Mint and place in the center of the Oreo, to finish the hat.  

Next, using  a pair of scissors, cut the orange gumdrop into a very small wedge shape, to be the carrot nose.  Using the point of a sharp knife, make a small hole in the top marshmallow where you would like the nose placed.  Place the orange gumdrop into the hole, using the tip of the knife if necessary. 

Next, using a pair of scissors, cut a fruit roll-up into a long narrow strip, measuring about 7-8-inches long.  Tie around the “neck” as a scarf. 


Lastly (and you definitely want to save this for last, so it doesn’t smear during the other steps), use the black decorating gel to pipe on the snowman’s eyes and mouth. 

Now step back and show off your handiwork, taking as many pictures as mom deems necessary.


Then do what you’ve wanted to do since the beginning…..eat and enjoy!   


******************************

If you're looking for another fun cupcake project...don't forget to check out my cute Groundhog's day cupcakes for Groundhog's Day coming up next week. We've been making them every year for the last decade or so,  for the kids to share with their school classes

Raspberry Swirl Coffee Cake

This beautiful coffee cake was a tasty way to start a cold winter's morning.  I got the recipe from an old Simple and Delicious magazine where the submitter bragged that it had won the "Best of Show" ribbon at her local fair.  With its raspberry swirls and unique yogurty flavor, it won best of show at our house too!   NOTE:  I've had a couple people ask about using other flavors of yogurt and preserves and while I've never tried it, I think it would be absolutely delicious.  We're trying it later this week with blueberry yogurt and preserves. 

Click here for printable recipe.


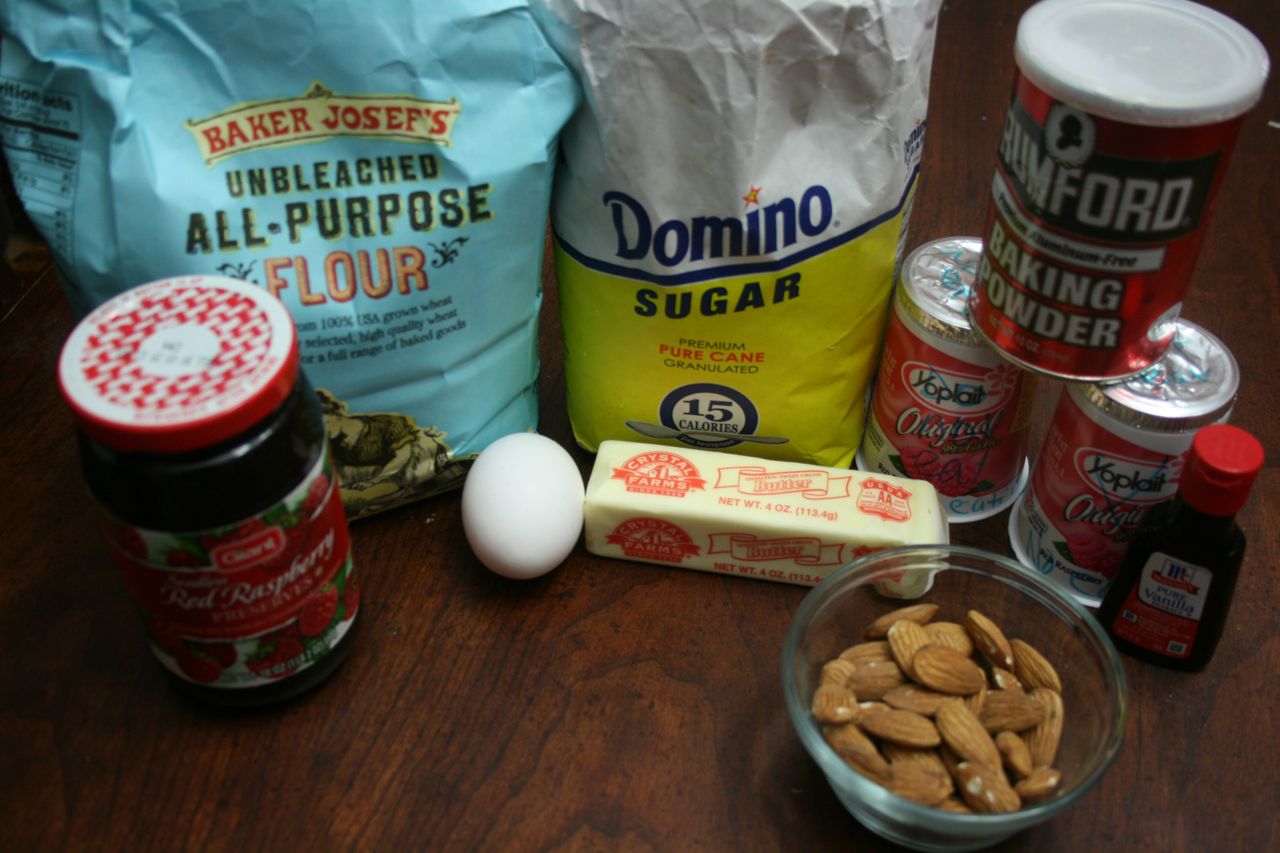
The ingredients:

2 cups all-purpose flour
3/4 cup sugar
2 tsp. baking powder
1/2 tsp. salt
1 egg
1 cup (8-ounces) raspberry yogurt ( I used Yoplait 99% fat-free original yogurt)
1/2 cup butter, melted
1 tsp. vanilla extract
1/2 cup chopped almonds, toasted (optional)
1/2 cup seedless raspberry preserves, divided
2 Tbs. sliced almonds, toasted (oops, we forgot to do this)

Directions: 
In a large bowl, combine the flour, sugar, baking powder, and salt.  In another bowl, whisk the egg, yogurt, butter, and vanilla until blended; stir in dry ingredients just until moistened.  Stir in the chopped almonds.  (batter will be thick)

Pour into a greased 9-inch springform pan (or just regular 9-inch round cake pan). 

Drop 1/3 cup preserves by tablespoonfuls over batter; cut through with a knife to swirl. 

Sprinkle with sliced almonds (we forgot this step).  Bake at 350° for 40-45 minutes or until a toothpick inserted near the center comes out clean.

Cool on a wire rack for 10 minutes, then remove sides of the pan if a springform pan was used. 

In a small saucepan, heat remaining preserves until melted; drizzle over serving plates.  Top each with a piece of coffee cake.  (we also skipped this, since I did not care about making it pretty for my kids).  Makes 10 servings. 


Enjoy!


I’m linking up with Cheryl at Tidy Mom for “I’m Lovin’ It Friday”,
and with Kim at Quit Eating Out for her “Saturday Swap”.
Please check them out!!